In the first part of this two-step tutorial I presented the techniques for loading and presenting a view controller. Those techniques include both graphical and programming approaches, so everybody can choose what fits best to them when a new view controller is about to be presented. However, in that post I didn’t show at all how data can be sent back and forth between two view controllers, so I’m going to do so right next.
In the sections that follow, I’ll start by showing how to send data from the already presented view controller to the new (presenting) one, both when using segues or code for the presentation. After that, I’ll focus on how to send data back from from the new view controller to the previous one, and I’ll go through three different ways that allow us to perform such an action.
Right before we start, I take as granted that you’ve followed the first part of this tutorial (or at least you’ve read the parts you’re interested in), as the simple project demonstrated there is the base where we’ll keep on building. Also, you can download a project containing everything presented in that post from here. On top of that and regarding this post, to keep things as easy as possible and always into the point, we’ll use the Xcode console to display messages and verify that all the actions presented next are actually working. No new UI will be created here.
From Source to Destination: Sending Data When Using Segues
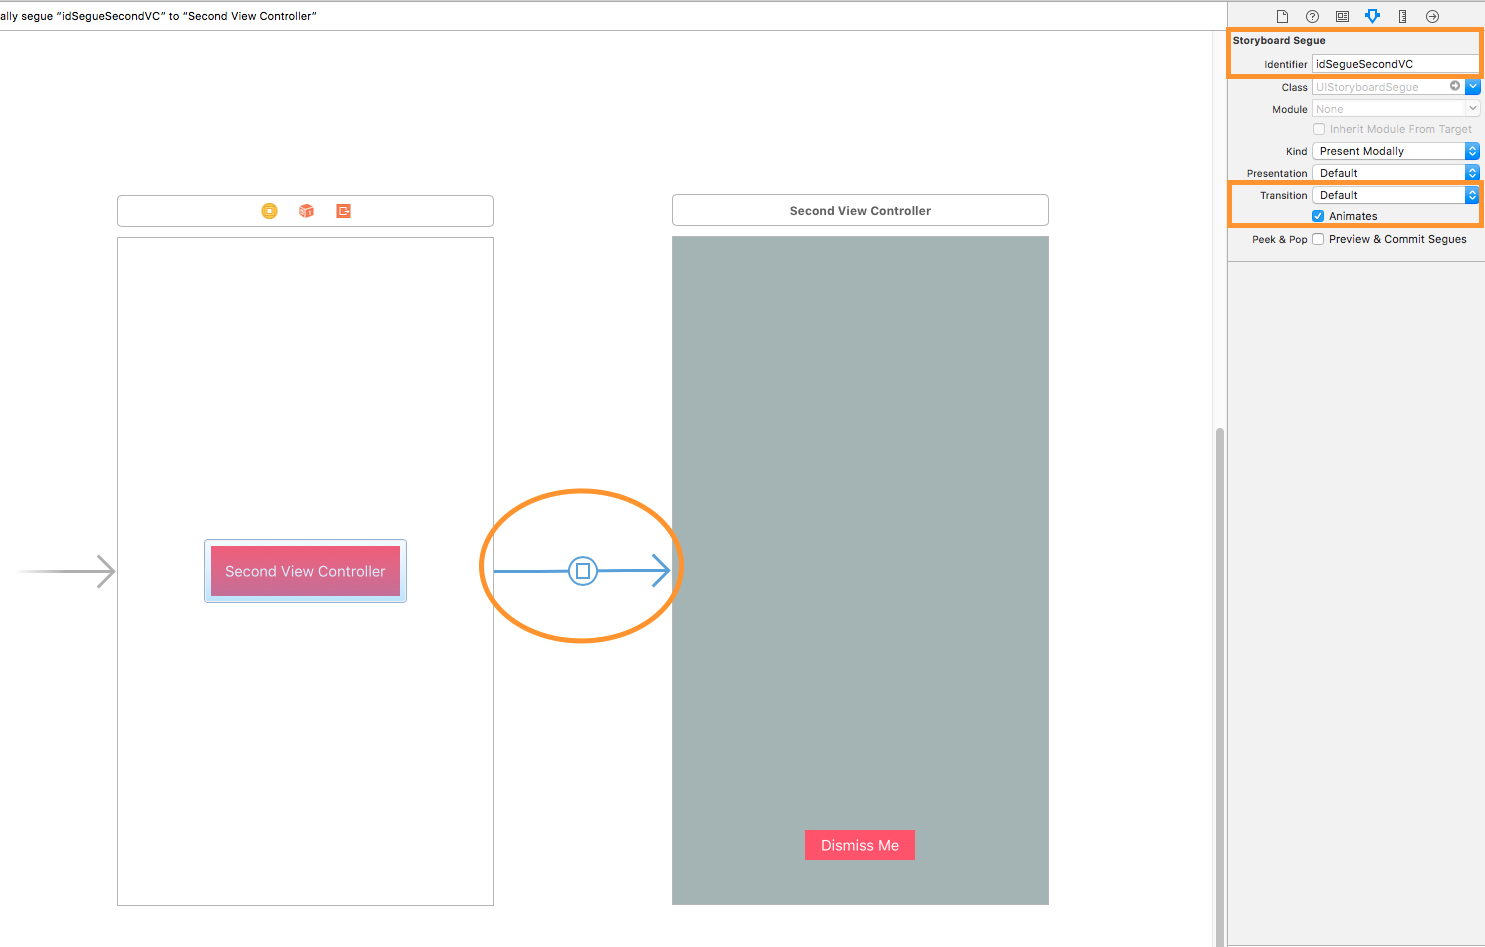
For the sake of our example, we’ll send a randomly generated number (Int number) from the FirstViewController to the SecondViewController after it’s loaded but not presented yet. We’ll do that when we present the latter using the segue with the identifier idSegueSecondVC. To refresh your memory, in the previous part of the tutorial we had connected a segue from the button titled Second View Controller to the Second View Controller scene with that identifier in the Main storyboard:
Our aim here is to use that identifier to specify the segue we want, and then pass the random value to the second view controller. However, before we get there, we must start from something else: Every view controller that has to be provided with values when it’s presented, it must contain properties that can actually hold the values passed to it, otherwise no data can be sent from the source to the destination view controller. So, our first task here is to open the SecondViewController.swift file and add the next property, so it’s possible to keep an Int random value:
|
1 2 3 |
var randomNumber: Int! |
Next, we’ll just print that random number to Xcode console once the root view of the view controller has appeared:
|
1 2 3 4 5 6 7 8 9 |
override func viewDidAppear(_ animated: Bool) { super.viewDidAppear(animated) if let random = randomNumber { print(“Random number received from FirstViewController:”, random) } } |
With the above two actions we manage to:
- Keep some data (an Int value) that will be passed to this view controller in a property,
- Verify that this data has been successfully passed by printing it to the console.
The above is all we need to do in the SecondViewController class, and it consists of the half of the job required to pass data from the source to the destination view controller. The other half of the job is to prepare and send the random value in the FirstViewController. We’ll continue by opening the FirstViewController.swift file, and by overriding the following method:
|
1 2 3 4 5 |
override func prepare(for segue: UIStoryboardSegue, sender: Any?) { } |
When you add a new view controller into a project, this method is added automatically by Xcode along with the rest of the default code, however it’s commented out. All you have to do is to uncomment it. In case it’s not there, just copy and paste the above snippet in your FirstViewController.swift file.
When presenting view controllers using segues, the above method is called every time before a view controller is presented. This is the place where you can pass any data you want to the view controller that will be presented, and obviously this is what we’ll use here too. As this method is general and is called for all segues that are connected to the source view controller, we must manually distinguish the segue that we refer to using the segue’s identifier. Therefore, this is why it’s important to set identifiers for your segues when you create them.
Once we distinguish the segue, we must get access to the view controller that is about to be presented, and eventually assign the values we want to its various properties. This is possible through the destination property of the segue parameter value. To demonstrate everything, here’s the implementation of the above method for our example:
|
1 2 3 4 5 6 7 8 9 10 |
override func prepare(for segue: UIStoryboardSegue, sender: Any?) { if let identifier = segue.identifier { if identifier == “idSegueSecondVC” { if let secondVC = segue.destination as? SecondViewController { secondVC.randomNumber = self.generateRandomNumber() } } } |
Let’s see step by step what’s going on in the above code:
- Initially we make sure that the segue has an identifier, and we proceed only if it has been set.
- We set a condition, where we proceed if only the identifier is called idSegueSecondVC.
- We get an instance of the
SecondViewControllerclass using thedestinationproperty of the segue object. Pay attention to the cast made above, as thedestinationproperty returns a generalUIViewControllerobject, and we won’t be able to access the custom property of our view controller. - If instantiating the
SecondViewControlleris successful, then we assign a random number to therandomNumberproperty we created previously.
The above steps are always the same when it comes to pass data to a new view controller. All that changes is the kind of data passed from one to another view controller.
In the above code we refer to a method called generateRandomNumber(), and this method doesn’t exist yet. Time to define it:
|
1 2 3 4 5 |
func generateRandomNumber() -> Int { return Int(arc4random_uniform(100)) } |
This method returns a random number between 0 and 99.
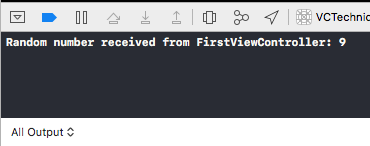
That’s all we need to do. If we test the app now and tap on the red button titled Second View Controller, the random number will be printed to the console once the second view controller is presented:
(These values are printed after having presented the second view controllers five times in a row).
Before we end this section, there’s one more important thing that has to be mentioned. Whatever I presented previously also applies when you trigger a segue programatically using the perform(withIdentifier:sender:) method. We’ve already invoked that method in the previous part of the tutorial, in the handleDoubleTap() method in the FirstViewController.swift file:
|
1 2 3 4 5 |
@objc func handleDoubleTap() { self.performSegue(withIdentifier: “idSegueSecondVC_2”, sender: self) } |
The above presents the second view controller when we double tap on the view of the first view controller. However, no random number will be passed in that case, because the segue that is performed has the idSegueSecondVC_2 identifier. If you want to make it work too, just update the prepare(for segue:sender:) method:
|
1 2 3 4 5 6 7 8 9 10 11 |
override func prepare(for segue: UIStoryboardSegue, sender: Any?) { if let identifier = segue.identifier { if identifier == “idSegueSecondVC” || identifier == “idSegueSecondVC_2” { if let secondVC = segue.destination as? SecondViewController { secondVC.randomNumber = self.generateRandomNumber() } } } } |
From Source to Destination: Passing Data When Loading a View Controller in Code
In case you don’t use segues but you like loading and presenting view controllers programmatically, then things can be even easier than all the previous stuff. All you need is to assign the values you want to the proper properties of the destination view controller right after you have it loaded and before you present it.
To see that in action, let’s open the ThirdViewController.swift file that contains the implementation of the ThirdViewController (this one was presented fully in code). Similarly to what we previously did, let’s declare an Int property for the random value that we’ll pass in this view controller too. In the beginning of the the class, add the following:
|
1 2 3 |
var randomNumber: Int! |
And of course the next code to see the random number in Xcode console:
|
1 2 3 4 5 6 7 8 9 |
override func viewDidAppear(_ animated: Bool) { super.viewDidAppear(animated) if let random = randomNumber { print(“Random number received from FirstViewController:”, random) } } |
Now the interesting part. Open the FirstViewController.swift file and locate the presentThirdVC() method where we load and present the ThirdViewController. In it, add the following highlighted line after the view controller is loaded, but before it gets presented:
|
1 2 3 4 5 6 7 8 9 10 |
@IBAction func presentThirdVC() { let thirdVC = ThirdViewController() thirdVC.randomNumber = self.generateRandomNumber() thirdVC.modalTransitionStyle = .partialCurl self.present(thirdVC, animated: true, completion: nil) } |
If we test the demo app now, then by tapping on the red button titled Third View Controller something similar to the next output will be printed to Xcode console:
That simple code demonstrates clearly how to pass data from the source to the destination controller when you work fully in code.
Sending Data From Destination to Source View Controller: The Delegation Pattern
Starting from this section, we’re going to focus on the various possible ways that allows us to send data from the presented view controller back to the one that triggered its presentation. I’ll show you three methods in total, and we’re going to begin by the most usual one: The delegation pattern.
Using delegation is really simple as far as you understand the concept and the steps that have to be followed. Please make a search on the web for details about it works, as it’s not part of my plans here to make an extensive reference to it; instead, I’ll show how it works through the demonstration. For the sake of the example, we’re going to implement the following easy scenario: We’ll update our app, so every time the dismiss button is tapped on the SecondViewController the current timestamp to be sent to the FirstViewController and printed then to Xcode console.
The delegation pattern includes actions in both view controllers where data has to be exchanged. Usually, we’re getting started by the view controller that the data should be sent from, and by implementing a new protocol. This protocol contains the signatures of methods that should be called whenever data has to be sent, but they’re implemented in the target view controller. Of course there are some more details along the way, but we’ll see them too.
Back to our project, open the SecondViewController.swift file and move right before the beginning of the SecondViewController class implementation at the top of the file. Add the following protocol along with one method signature only:
|
1 2 3 4 5 |
protocol SecondViewControllerDelegate { func secondVCWillDismiss(withTimestamp timestamp: TimeInterval) } |
What we really want is to call the above method when the user taps on the dismiss button, but to get access to it we have to declare an object of that protocol in the SecondViewController class (and use it of course later):
|
1 2 3 4 5 6 7 8 9 10 11 |
class SecondViewController: UIViewController { var randomNumber: Int! var delegate: SecondViewControllerDelegate! … } |
Let’s head to the definition of the dismissMe() IBAction method now. For the time being, there’s one line of code there that makes the view controller get dismissed. This is going to change, as we’ll add a few more lines to the beginning of the method where we’ll do two things:
- We’ll make sure that the
delegateobject that we just declared as a property is notnil(so it’s possible for us to use it), - We’ll call the
secondVCWillDismiss(withTimestamp:)delegate method.
The required changes are highlighted right next:
|
1 2 3 4 5 6 7 8 9 |
@IBAction func dismissMe() { if let delegate = self.delegate { delegate.secondVCWillDismiss(withTimestamp: Date.timeIntervalSinceReferenceDate) } self.dismiss(animated: true, completion: nil) } |
Let’s take a breath here and let’s see what we’ve done so far once again:
- We started by implementing a protocol that contains the signature of methods that will be called when data has to be sent to the
FirstViewController. The purpose here is to adopt theSecondViewControllerDelegateprotocol in theFirstViewControllerand implement the one method we only have with the logic we want to apply. - We created a
delegateproperty (actually you can call it however you like) which let us have access to thesecondVCWillDismiss(withTimestamp:)method. - We called that method at the point where we want to send some data back to the
FirstViewController.
Now, let’s jump to the other side, and let’s open the FirstViewController.swift file. We’ll start by adopting our custom protocol as shown here:
|
1 2 3 4 5 |
class FirstViewController: UIViewController, SecondViewControllerDelegate { … } |
The next and really important step is to set the FirstViewController as the delegate of the SecondViewController (in other words to tell the app that the FirstViewController is actually listening for incoming messages by the SecondViewController through the SecondViewControllerDelegate protocol). Go to the prepare(_:sender:) method override where we get access to the second view controller right before any of the idSegueSecondVC or idSegueSecondVC_2 segue is performed and add the highlighted line:
|
1 2 3 4 5 6 7 8 9 10 11 12 13 |
override func prepare(for segue: UIStoryboardSegue, sender: Any?) { if let identifier = segue.identifier { if identifier == “idSegueSecondVC” || identifier == “idSegueSecondVC_2” { if let secondVC = segue.destination as? SecondViewController { secondVC.randomNumber = self.generateRandomNumber() secondVC.delegate = self } } } } |
Lastly, we have to implement the one and only protocol method in the FirstViewController class:
|
1 2 3 4 5 |
func secondVCWillDismiss(withTimestamp timestamp: TimeInterval) { print(“Second View Controller dismissed at:”, timestamp) } |
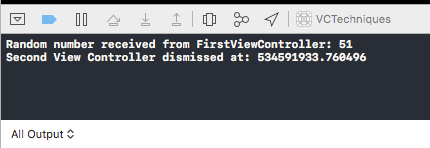
That’s it! If we run the app now, the FirstViewController receives the message from the SecondViewController along with the timestamp data right before it gets dismissed, and prints something like that:
The delegate pattern is a quite common technique, and it’s considered as one of the must-know things for every iOS developer. Even though the example we just saw is extremely simple, it’s easy to scale by adding a varying number of methods in real-life big projects. By using delegation we can send messages from one view controller to another, even if there’s no actual data to pass. As a last word, delegation can be used between any kind of classes as a communication method, and not between view controllers only.
Sending Data From Destination to Source View Controller: Notifications
Another way to send data between view controllers (and generally any kind of classes) is the use of notifications. A class can post an internal to the application notification (or in other words a message) that can include or not data, and another class (or more) that listens for that notification receives the message and acts appropriately. Posting notifications and observing for them is always the same standard technique, which we’re going to see right next.
For our demonstration, we’ll post a notification when the SecondViewController appears. Along with the notification, we’ll send the timestamp that the view controller appeared. The FirstViewController will observe for that notification, and upon receiving it, we’ll display a message that will be saying the time the view controller appeared. Simple enough, but it’s all we need to stay into the point.
To get started, open the SecondViewController.swift file. The first step is to post the notification through the NotificationCenter class. Also, we need to provide a unique name for our notification, so it’s easy to be distinguished later.
In the viewDidAppear(_:) method, add the following highlighted line:
|
1 2 3 4 5 6 7 |
override func viewDidAppear(_ animated: Bool) { … NotificationCenter.default.post(name: NSNotification.Name(“secondVCDidAppearNotification”), object: Date.timeIntervalSinceReferenceDate) } |
That’s all it takes to post a notification! Notice that:
- The secondVCDidAppearNotification is the unique name for our notification.
- We pass the current timestamp as an object to the notification that will be sent.
The next step is to go to the FirstViewController.swift file, and start observing for that notification. So far, just posting the above notification has no result at all.
In the viewDidLoad() method of the FirstViewController class, add the next line:
|
1 2 3 4 5 6 7 |
override func viewDidLoad() { … NotificationCenter.default.addObserver(self, selector: #selector(self.handleSecondVCDidAppearNotification(notification:)), name: NSNotification.Name(“secondVCDidAppearNotification”), object: nil) } |
With this, we make the FirstViewController start observing for our custom notification every time it’s loaded. As you see, we use the exact same, unique name for the notification we want to observe, and that’s the way we have to say to the system what notification we’re interested in. So, be cautious with that and provide the proper names regarding the notifications you want to catch in your classes.
Once a notification arrives, an action must be taken. This action is always implemented in the method invoked in the #selector parameter value, and in the above snippet you see that we specify the handleSecondVCDidAppearNotification(notification:) method as the one that will be called every time the notification is received. Let’s define that method:
|
1 2 3 4 5 6 7 |
@objc func handleSecondVCDidAppearNotification(notification: Notification) { if let timestamp = notification.object as? TimeInterval { print(“Second View Controller appeared at:”, timestamp) } } |
Remember that the timestamp we want to display comes as the object of the notification, therefore we need to access it and make sure it’s there. Then, we just print it to Xcode console.
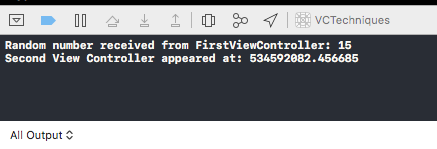
Run the app now; you’ll notice that when the SecondViewController appears a message is printed to the console. Once again, we managed to send data from the destination to the source view controller in just a few simple steps. I remind you that the technique presented in this section can be used whenever you want to send messages between and kind of classes, and not view controllers only.
Sending Data From Destination to Source View Controller: Action Handlers
The last method to pass data from the destination back to the source view controller relies on the use of action handlers. The details of this technique are shown right next through the example, but just to outline the general idea I would say that if you’ve ever created or used a completion handler in a function then what you’ll see will look familiar. It worths mentioning though that this approach is not so common between view controllers as it is between general classes, as the delegation pattern or the notifications are the most preferred approaches. However, if implementing the delegation pattern or sending and receiving notifications is a big deal in certain cases, then this way is the most suitable solution to receive data from the destination view controller, as it’s a fast implementation.
For the sake of the example, this time we’ll use the ThirdViewController and the dismiss action that lets us close that view controller. We’ll define an action handler, and upon dismissal we’ll call it, which in turn will make the FirstViewController display the usual now timestamp.
Getting straight into the point, open the ThirdViewController.swift file and add the following declaration in the beginning of the class:
|
1 2 3 4 5 6 7 8 |
class ThirdViewController: UIViewController { var actionHandler: ((_ timestamp: TimeInterval) -> Void)! … } |
With the above we declare a callback handler which we’ll call when we dismiss the view controller. Later, we’ll assign a closure to that handler in the FirstViewController after the initialisation and before we present the ThirdViewController, and in the body of that closure we’ll print the timestamp on the console.
In the dismissMe() method now where we dismiss the view controller, let’s add the highlighted lines as shown below:
|
1 2 3 4 5 6 7 8 9 |
@objc func dismissMe() { if let actionHandler = self.actionHandler { actionHandler(Date.timeIntervalSinceReferenceDate) } self.dismiss(animated: true, completion: nil) } |
It’s important to make sure that the actionHandler property is not nil. In case it’s nil and we don’t take it into account, we’ll enjoy a really beautiful crash of the app when we’ll tap on the dismiss button. Besides that, notice that we pass the current timestamp as the argument in the action handler, which is the kind of value it expects according to the previous declaration.
Let’s open the FirstViewController.swift now, and let’s head to the presentThirdVC() method. So far, this method loads the ThirdViewController, it creates and passes a random value to it, and it specifies a transition style and finally presents the view controller. It’s about time to make an addition, and to assign to the actionHandler property we declared above a closure, the code of which will be executed every time the action handler is called in the ThirdViewController. The snippet below highlights the required changes:
|
1 2 3 4 5 6 7 8 9 10 11 12 13 14 |
@IBAction func presentThirdVC() { let thirdVC = ThirdViewController() thirdVC.randomNumber = self.generateRandomNumber() thirdVC.actionHandler = { timestamp in print(“Third View Controller dismissed at:”, timestamp) } thirdVC.modalTransitionStyle = .partialCurl self.present(thirdVC, animated: true, completion: nil) } |
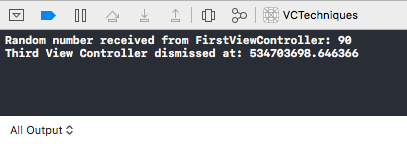
By running the app and opening the ThirdViewController, here’s what we get in Xcode’s console by tapping on the dismiss button:
Summing Up
At this point we conclude the second part of this two-parts tutorial regarding the existing techniques that allow us to load and present view controllers, and pass data back and forth between them. In this part we focused on how to pass data from the source view controller to the destination one, and how to send data back to the source by examining three different approaches. By trying to keep it simple and stay into the point I intentionally avoided all the theory behind all the concepts presented here, but it’s easy to find more information on the web if you feel like it. Regardless, it’ll be easy for you to exchange data between your view controllers if you stick to the examples demonstrated in this post.
For your convenience, you can download the demo project that includes all the examples we went through from this link.
