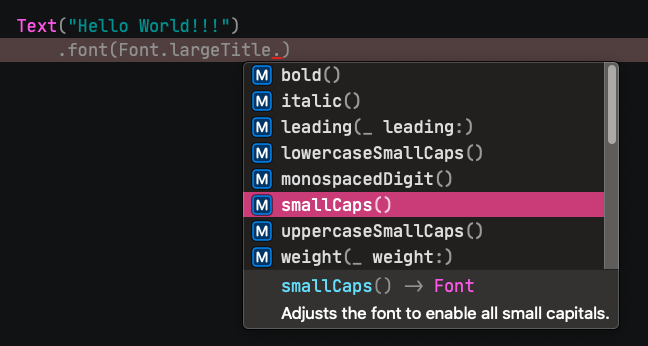
Have you ever wondered how to apply text transformations in SwiftUI, such as small caps, lowercase small caps, or uppercase small caps? It’s actually pretty easy, as all available transformations are available and suggested by Xcode when specifying the font.
Consider the following example that applies the largeTitle font to text:
|
1 2 3 4 |
Text(“Hello World!!!”) .font(.largeTitle) |
Before applying any transformation, it’s necessary to explicitly set the class that the largeTitle belongs to:
|
1 2 3 4 |
Text(“Hello World!!!”) .font(Font.largeTitle) |
Then, just press the dot key in your keyboard and Xcode will suggest all possible transformations that can be applied to the font:

For example, by applying the small caps effect on the text the result looks like this:

|
1 2 3 4 |
Text(“Hello World!!!”) .font(Font.largeTitle.smallCaps()) |
The only mandatory thing to do is to specify the Font class explicitly, as it seems that Xcode cannot infer it automatically. The above works for both system and custom fonts. Here’s another example that makes the system font bold with a custom size and applies a different effect:
|
1 2 3 4 |
Text(“Hello World!!!”) .font(Font.system(size: 40, weight: .bold).lowercaseSmallCaps()) |

And one last example using a custom font:
|
1 2 3 4 |
Text(“Hello World!!!”) .font(Font.custom(“AvenirNext-Bold”, size: 40).uppercaseSmallCaps()) |

I hope that quick tip will be proved useful to you! These font transformations lead to nice visual results and can really make displayed texts more interesting and eye-catching!
You can find this post published on Medium too!