Showing and hiding the keyboard in UIKit based projects requires none or a minimum amount of effort to do. Keyboard shows up when a text control (textfield, textview) gets the focus by tapping on it, or when the becomeFirstResponder() method is called programmatically. It’s dismissed when we call the resignFirstResponder() method of the text control, or users choose to do so on iPad devices using the key to hide the keyboard.
Many times it’s not really necessary to be informed about the keyboard show or hide events when they happen. However, there are occasions where it’s really crucial to get notified when any of these two events occur in order to take further actions that affect the flow of the app.
Any class that needs to be notified about the appearance and disappearance of the keyboard must observe for any of the following two notifications, depending on the event that is in interest:
|
1 2 3 4 5 |
UIResponder.keyboardWillShowNotification UIResponder.keyboardWillHideNotification |
In particular, there are certain steps that have to be followed in order to be notified about and handle keyboard events:
- The class must start observing for the notifications mentioned above. Usually they go in pair, but that’s not mandatory.
- For each observed notification, a selector method must be defined where the additional actions regarding the received event will be implemented or triggered.
- In most keyboard appearance occasions keyboard frame is required to be used in order to make UI-related calculations. Although simple, extracting it from the received notification is not an easy to remember task.
It’s obvious that the series of actions outlined above inevitably cause a level of friction to the development flow. Especially if they must be taken repeatedly to handle keyboard events in several places inside an app.
However, all that can change pretty easily by implementing:
- A class that will handle all the above steps.
- A protocol that will be making use of that class. At the same time, it will be providing a ridiculously simple new API to use in order to handle keyboard events.
The Goal Of This Post
They say that a picture equals to a thousand words, but in our case a code snippet does that! What we’ll build in this post will be a solution that will allow to handle keyboard show and hide notifications in the following fashion:
|
1 2 3 4 5 6 7 |
startKeyboardObserving { (keyboardFrame) in // Do something when the keyboard will show… } onHide: { // Do something when the keyboard will hide… } |
Undoubtedly this is a much, much simpler way to deal with keyboard notifications comparing to the traditional approach described in the previous part. Its greatest advantage is the fact that it almost eliminates any delay to the development process.
So, let’s jump straight ahead to the implementation of both the small class and the protocol previously mentioned. None of them is going to introduce any particular difficulty, so we’ll have that new solution implemented pretty fast!
Before You Begin…
There is a starter project for you to download from here. It’s a really simple iOS app that contains a textfield that triggers the appearance of the keyboard, and a button that dismisses it. Additionally, it has a source file called KeyboardObserver.swift; it’s the place where we’ll start writing code right next.
The KeyboardObserver Class
Open the starter project in Xcode, and then go to the KeyboardObserver.swift file. We’ll begin by defining the class that will be handling the keyboard notifications. It will have the same name to file: KeyboardObserver.
|
1 2 3 4 5 |
class KeyboardObserver { } |
The first move after having defined the above class is to add an initialiser method. It will be accepting two parameter values, and both of them will be closures.
The first closure will be called every time the keyboard is about to show. The second, when the keyboard is about to hide.
Here is the init() method:
|
1 2 3 4 5 |
init(onShow: @escaping (_ keyboardFrame: CGRect) -> Void, onHide: @escaping () -> Void) { } |
See that both of closures are marked as @escaping. That means that they can be called even after the execution of the init() method is finished.
However, and in order to achieve that, it’s necessary to keep both closures in local stored properties in the KeyboardObserver class. Therefore, before we continue here, let’s declare the following two properties:
|
1 2 3 4 5 6 7 8 9 |
class KeyboardObserver { private var onShowHandler: ((_ keyboardFrame: CGRect) -> Void)? private var onHideHandler: (() -> Void)? … } |
Back to the initialiser method now, let’s assign both parameter values to the properties we declared. Doing so will allow later to call the one or the other once a keyboard notification has been received.
|
1 2 3 4 5 6 |
init(onShow: @escaping (_ keyboardFrame: CGRect) -> Void, onHide: @escaping () -> Void) { onShowHandler = onShow onHideHandler = onHide } |
The initialiser method will also be used for setting the KeyboardObserver instance as an observer for the keyboard notifications to the notification center. In order to keep things tidy and clean, we’ll add the observing-related code to the following new method:
|
1 2 3 4 5 6 7 8 9 10 11 12 13 |
private func startObserving() { NotificationCenter.default.addObserver(self, selector: #selector(handleKeyboardWillShow(notification:)), name: UIResponder.keyboardWillShowNotification, object: nil) NotificationCenter.default.addObserver(self, selector: #selector(handleKeyboardWillHide(notification:)), name: UIResponder.keyboardWillHideNotification, object: nil) } |
See that the startObserving() method is marked as private. That’s because this method is meaningful only here, and we don’t want it to be accessible out of the class.
Back to the initialiser, let’s call the startObserving() method and let that be the last piece of code we’re adding to it:
|
1 2 3 4 5 6 7 |
init(onShow: @escaping (_ keyboardFrame: CGRect) -> Void, onHide: @escaping () -> Void) { … startObserving() } |
In the startObserving() method we declared two selector methods which Xcode is throwing errors for. That’s expected; none of them still exists, so let’s fix that by implementing them. Notice that both of them will be marked as private as well, since they’re important for this class only.
We’ll start with the first one called handleKeyboardWillShow(notification:). We’ll do two things in it:
- We’ll extract the keyboard frame from the notification object.
- We’ll call the
onShowHandlerclosure, passing the keyboard frame as an argument.
Here we go:
|
1 2 3 4 5 6 |
@objc private func handleKeyboardWillShow(notification: Notification) { guard let keyboardFrame = notification.userInfo?[UIResponder.keyboardFrameEndUserInfoKey] as? CGRect else { return } onShowHandler?(keyboardFrame) } |
The other method that regards the keyboard disappearance will be even simpler than the one above. We’ll just call the onHideHandler closure:
|
1 2 3 4 5 |
@objc private func handleKeyboardWillHide(notification: Notification) { onHideHandler?() } |
At this point the KeyboardObserver class is almost ready. I’m saying almost, because there’s one more method we need to implement. It will be used to perform some sort of clean up. Particularly:
- We’ll stop observing for both keyboard notifications.
- We’ll make both
onShowHandlerandonHideHandlerclosuresnil. Although not mandatory, we’ll do that in order to prevent any strong references from remaining alive, even if no[weak self]or[unowned self]capture value is provided to the capture list of each closure upon using them.
We’ll name that new method stopObserving():
|
1 2 3 4 5 6 7 |
func stopObserving() { NotificationCenter.default.removeObserver(self) onShowHandler = nil onHideHandler = nil } |
KeyboardObserver class is now complete, so it’s time to implement the protocol.
The KeyboardObservable Protocol
The protocol that we will implement in this part will be acting as an intermediate between the KeyboardObservable class and any other type that will be adopting it. It will contain:
- A required stored property, an instance of the
KeyboardObserverclass. With it, we’ll ensure that any type adopting the protocol will always contain a property with the same name to represent theKeyboardObserverinstance. Why is that important? Because we’ll provide default implementations for the methods described right next. In these implementations, it’s really crucial to know what the name of the property that represents theKeyboardObserverinstance is, without asking from adopting classes to explicitly provide it. - As just mentioned, protocol will also contain two required methods. The first will be the one that will let us easily deal with keyboard events handling. The other will be used to stop observing for the notifications. We’ll provide a default implementation for both of them.
We’ll name the protocol KeyboardObservable. In Xcode, still in the KeyboardObserver.swift file, go right after the closing curly bracket of the class and add the following:
|
1 2 3 4 5 6 7 8 |
protocol KeyboardObservable: AnyObject { var keyboardObserver: KeyboardObserver? { get set } func startKeyboardObserving(onShow: @escaping (_ keyboardFrame: CGRect) -> Void, onHide: @escaping () -> Void) func stopKeyboardObserving() } |
KeyboardObservable conforms to the AnyObject protocol in order to restrict its adoption to reference types only, meaning to classes.
Besides that, see that the parameters in the first method are identical to the parameters in the initialiser of the KeyboardObserver class. Both of them are closures that will be implemented upon calling that method, and will be passed as arguments to the initialisation of the keyboardObserver property.
I mentioned previously that we’re going to have a default implementation for both required methods defined in the protocol above. We can achieve that by implementing the following protocol extension:
|
1 2 3 4 5 |
extension KeyboardObservable { } |
In the implementation of the first method, we’ll simply initialise the keyboardObserver property. Make sure to add the following inside the extension:
|
1 2 3 4 5 6 |
func startKeyboardObserving(onShow: @escaping (_ keyboardFrame: CGRect) -> Void, onHide: @escaping () -> Void) { keyboardObserver = KeyboardObserver(onShow: onShow, onHide: onHide) } |
That’s the only thing necessary to be done in this method. In the next one, we’ll call the stopObserving() method of the KeyboardObserver class and we’ll make the keyboardObserver instance nil:
|
1 2 3 4 5 6 |
func stopKeyboardObserving() { keyboardObserver?.stopObserving() keyboardObserver = nil } |
And we’re done ???? !
Let’s try out now what we implemented right above!
KeyboardObserver & KeyboardObservable In Action
In Xcode, switch to the ViewController.swift file. The first step is to adopt the KeyboardObservable protocol:
|
1 2 3 4 5 |
class ViewController: UIViewController, KeyboardObservable { … } |
By adopting it, it’s instantly becoming mandatory to declare the required keyboardObserver stored property. So, add this right after the class opening:
|
1 2 3 4 5 6 7 |
class ViewController: UIViewController, KeyboardObservable { var keyboardObserver: KeyboardObserver? … } |
Next, in the viewDidLoad() method we’ll call the startKeyboardObserving(onShow:onHide:) method in order to handle both keyboard show and hide events. Since this is just a simple example we’ll be doing the following:
- In case of keyboard show, we’ll be making the hide keyboard button visible, and we’ll be printing the keyboard frame on the console.
- In case of keyboard hide, we’ll be making the button hidden again.
So, time to use what we’ve been working for all this time here:
|
1 2 3 4 5 6 7 8 9 10 11 12 13 |
override func viewDidLoad() { … startKeyboardObserving { (keyboardFrame) in self.button?.isHidden = false print(“Keyboard frame: \(keyboardFrame)“) } onHide: { self.button?.isHidden = true } } |
See how simple it is to handle keyboard events that way, and how easy it’s going to be to use it in multiple places within a project. All we did was to implement the traditional approach just once, and using two really simple custom types to end up to this result.
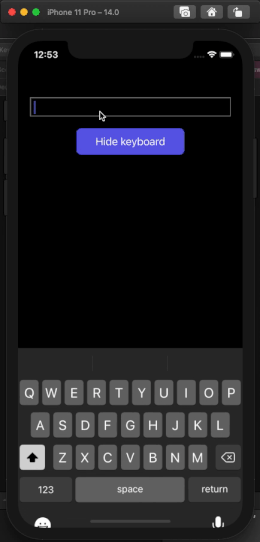
Time to try the demo app out now, so give it a spin in the Simulator (or a real device if you wish so). If you came step by step up until here, what you see should be similar to this:
It’s really important that you should not forget to call the stopKeyboardObserving() method whenever that’s necessary. And that would be cases where it’s not needed to observe for keyboard events any more. For example, if you dismiss a view that adopts the KeyboardObservable then make sure to stop observing before making it go away. In this simple example is not necessary to do something like that, but please keep it in mind for your own projects.
Summary
What we did here might not be looking spectacular, but it’s a small, great tool that makes dealing with keyboard events faster than the traditional way. Besides the simple implementation steps we performed in the previous parts, what makes KeyboardObserver class and KeyboardObservable protocol really handy is that they can be reused in multiple projects. All you have to do is to throw them into a Swift package or a framework, set the appropriate access level specifiers, and you’ll be done.
Thanks for reading, and take care ???? !
Check out this tutorial to find out more about Swift packages, and this one regarding access levels if necessary.
???????? Download the complete project containing the demonstrated code.