Applying a shape mask to the displayed content of views in SwiftUI is a task performed often, and it’s most common on images. For example, an app might want to display avatar images as circles, album covers as rounded rectangles, and so on. All that is possible without any hassle with the clipShape modifier.
SwiftUI provides a bunch of predefined shapes that can be found here, but custom shapes can be created as well. In this short post we won’t discuss about that, but we’ll use the predefined shapes in order to achieve the demonstration purposes.
Actually, we’re going to do two things in this post. Initially, I’ll guide you through the necessary steps to apply a clip shape on an image view. If that’s what you’re looking after, then the next part is all you need.
If you’d like to spend a few more minutes reading though, then get prepared for some fun with SwiftUI. We’ll add a picker to the view, and we’ll make it possible to apply various clip shapes depending on the selected choice. In order to do that, we’ll… well, you will see ???? !
Let’s jump straight in.
Applying A Clip Shape Modifier
Let’s take things from the beginning, and in a brand new SwiftUI project let’s add a demo Image view:
|
1 2 3 4 5 |
var body: some View { Image(“sample”) } |
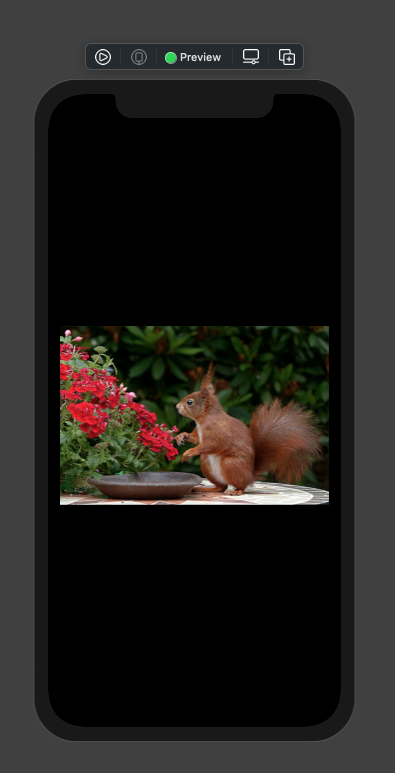
The sample image (taken from Pexels) I’m using here has a size of 640x426px, and as you see it exceeds the limits of the visible area of the screen:

To fix that, it’s necessary to use aspectRatio modifier with the .fit content mode, but that alone won’t do much; we also need to make the Image resizable with the resizable modifier:
|
1 2 3 4 5 6 7 |
var body: some View { Image(“sample”) .resizable() .aspectRatio(contentMode: .fit) } |
Pay attention to the order we apply the modifiers. resizable() must always be applied to the Image so it comes first.
In addition to the above, let’s also add some padding so the image doesn’t touch the edges of the screen:
|
1 2 3 4 5 6 7 8 |
var body: some View { Image(“sample”) … .padding() } |
Much better this time:
Let’s make the image circular now by applying the clipShape modifier as shown right next:
|
1 2 3 4 5 6 7 8 9 10 |
var body: some View { Image(“sample”) .resizable() .aspectRatio(contentMode: .fit) .padding() .clipShape(Circle()) } |
The parameter value must be an instance of a type that conforms to the Shape protocol. The Circle object we provided above is a predefined shape in SwiftUI, and it takes no arguments upon initialisation. Other shapes, such as the rounded rectangle, can accept arguments regarding its appearance.
The result from the above is the following:
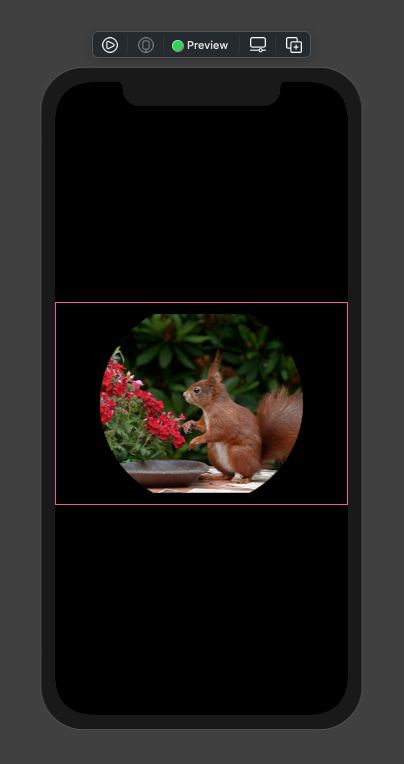
Well, that’s not what exactly we were looking for. Top and bottom sides look cropped, and there is a specific reason for that; padding must come after the clipShape modifier, and once again it’s becoming obvious that the order of modifiers really matters. Let’s swap them:
|
1 2 3 4 5 6 7 8 9 |
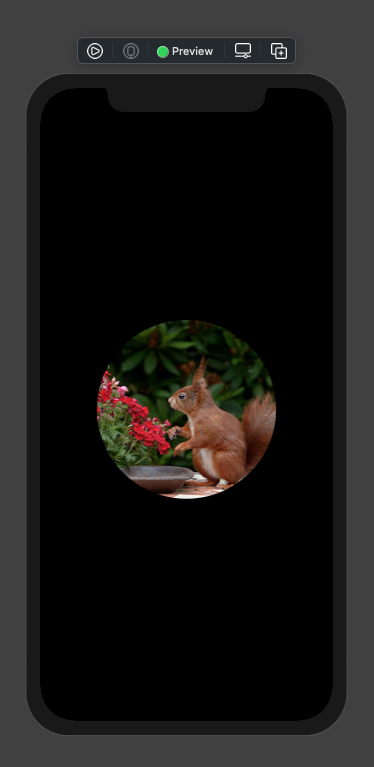
var body: some View { Image(“sample”) … .clipShape(Circle()) .padding() } |
This time it’s working just fine:
Let’s give it another try with a different shape:
|
1 2 3 |
.clipShape(RoundedRectangle(cornerRadius: 25.0)) |
The result:

Now you know how to use the clipShape modifier and apply a shape mask to an Image, as well as how to prepare the image for it. You can stop reading here if that technique is what you’re looking for. Or, keep going to see how to expand the above and make the clip shape change on the fly.
Changing Clip Shape On The Fly
Let’s play a bit with SwiftUI now, and let’s add a picker to the view that will provide options to change the applied clip shape on the image in real time. However, before doing that, let’s create a custom type, an enumeration for representing the various available shapes.
Right after the struct opening, add the ShapeType enumeration as shown here:
|
1 2 3 4 5 6 7 8 9 |
struct ContentView: View { enum ShapeType: String, CaseIterable, Shape { } … } |
Notice that the ShapeType conforms to CaseIterable and Shape protocols, and its raw values are going to be strings. With a bit more of details:
- String: The raw values of the enumeration are set to be of String type for one simple reason; for each single case we will need to display a respective string value in the picker describing the shape. Instead of doing that by hand, we’ll be using the raw value of each case.
- CaseIterable: That will let us access the available enumeration cases as an array and iterate through them. Useful for creating the picker options in a
ForEachloop instead of writing them one by one. - Shape: Even though it might not be clear at first glance why conformance to this protocol is necessary, the actual reason lies to the fact that any shape that is provided as argument to the
clipShapemodifier must be conforming to theShapeprotocol. We will need to pass aShapeTypevalue toclipShapepretty soon in order to make changes on the applied clip shape on the fly, and this conformance is what will make that possible.
With all that said, let’s define the available shapes we’ll provide:
|
1 2 3 4 5 6 7 8 9 |
enum ShapeType: String, CaseIterable, Shape { case circle = “Circle” case ellipse = “Ellipse” case capsule = “Capsule” case rounded = “Rounded Rectangle” case rectangle = “Rectangle” } |
These are not the only available shapes; they’re just those that I chose to use for this demonstration. You can find them all along with additional discussion about the Shape protocol in the official documentation from Apple.
The Shape protocol requires to implement the following method:
|
1 2 3 4 5 6 7 8 9 |
enum ShapeType: String, CaseIterable, Shape { … func path(in rect: CGRect) -> Path { } } |
Its purpose is to return the path that describes the shape inside the given frame. Here we don’t define any new shape; instead we want to use existing shapes, so here’s what we’ll do: Inside a switch statement we will return the path of the shape matching to each case, providing any argument values whenever necessary.
So, here’s the path(in:) method’s implementation:
|
1 2 3 4 5 6 7 8 9 10 11 12 |
func path(in rect: CGRect) -> Path { switch self { case .circle: return Circle().path(in: rect) case .ellipse: return Ellipse().path(in: rect) case .capsule: return Capsule().path(in: rect) case .rounded: return RoundedRectangle(cornerRadius: 25.0).path(in: rect) case .rectangle: return Rectangle().path(in: rect) } } |
In the case of the rounded rectangle we specify a corner radius value. It’s the default one and I left it as is just for demonstration purposes, but feel free to change it, or provide an additional argument for the style of the rectangle.
The ShapeType enumeration is now complete, so right after its closing and before the body opening declare the next state property:
|
1 2 3 |
@State private var shape: ShapeType = .circle |
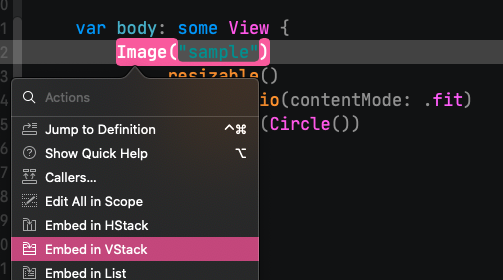
Time to add the picker, but first, Cmd+click on the Image and select to embed it in a VStack.
Then, add a picker that will be using the default style. See that we provide the binding value of the shape property so it gets updated whenever a different option is selected:
|
1 2 3 4 5 |
Picker(“Shape Type”, selection: $shape) { } |
Inside its body we’ll use a ForEach loop to go through all available cases of the ShapeType enumeration and create a simple Text using the raw value of each case. Notice in the following code that we get all cases by calling the allCases static property on the type itself and not on the shape property. Conformance to CaseIterable makes that possible.
|
1 2 3 4 5 6 7 |
Picker(“Shape Type”, selection: $shape) { ForEach(ShapeType.allCases, id: \.self) { shapeType in Text(shapeType.rawValue) } } |
We are almost ready, there’s is just one last thing to do; pass the shape property as an argument to the clipShape modifier:
|
1 2 3 |
.clipShape(shape) |
The clip shape applied on the image can now be changed on the fly:
That’s it! I hope you liked this post. Thanks for reading ???? and take care!