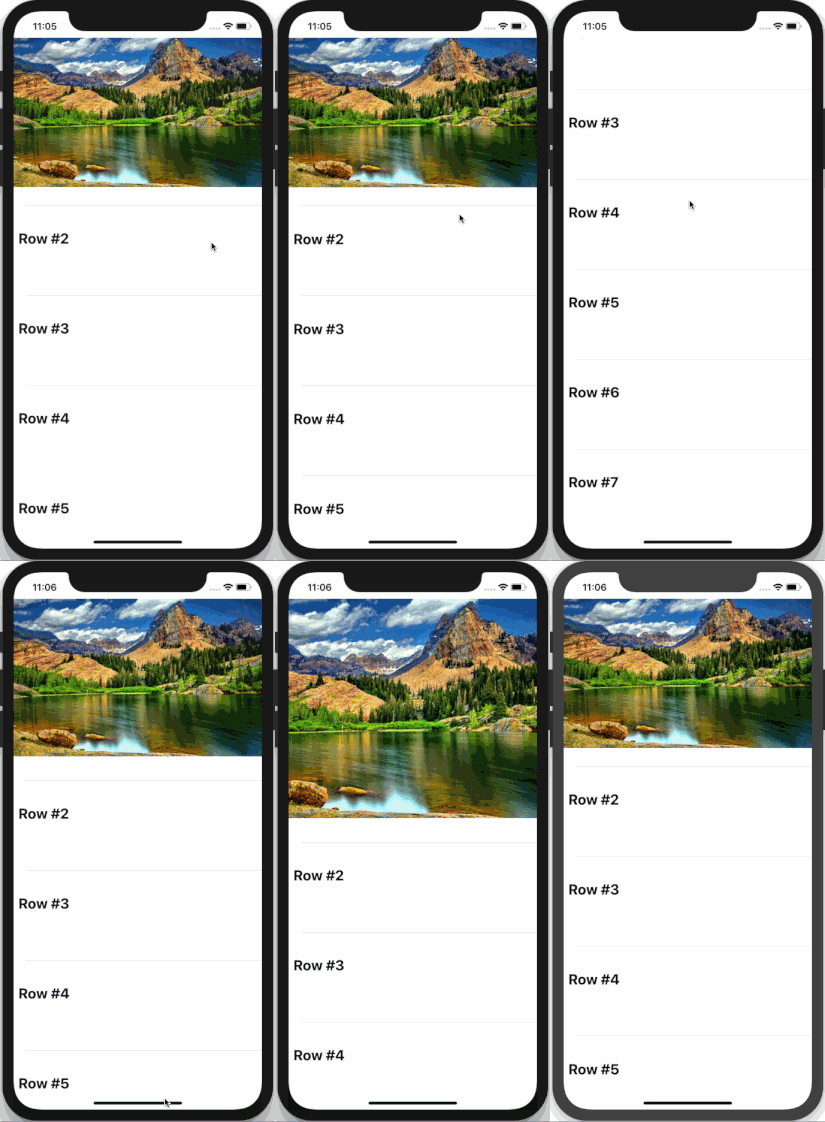
Welcome to an interesting Swift programming topic. To start, let’s see what I’m talking about here:
Creating a sticky and stretchy top cell consists of a good way to override the default tableview behaviour and make your UI look definitely cool. You might be thinking that it’s a complicated effect to achieve, but no, it’s not! Believe it or not, the actual code that creates the trick is taking up three lines of code only. Nowadays, several apps offer this effect, so why not yours as well?
In this short tutorial I’m going to show how to achieve the previous effect using two different approaches. So, just read on!
You can find those two approaches I’m discussing next as a gist here as well.
The Demo Application
Getting right into the point, here’s a starter application that I have created to demonstrate what I’m going to discuss here. There’s a table view (UITableView) added to the ViewController scene in the Main.storyboard file, which has been connected to an IBOutlet property in the ViewController class, and it has been initialised and configured as needed. Additionally, there are two custom cell subclasses created: One for the first cell that contains an image view (UIImageView) and a title, and one more for the rest of the tableview rows.
Get the starter project before we begin if you want to get your hands a little bit dirty, and open it in Xcode. When you do that, head to the ViewController.swift file to start making the necessary implementation. Or, get the final project if you prefer instead.
Some Background Info
Table view is based on the scrollview (UIScrollView) class, therefore every time we make a view controller the delegate of the tableview, we automatically also make it the delegate of its scrollview. That’s really important, because we need to get access to a scrollview’s property known as contentOffset. You’ll see how we’ll make use of that property in just a few moments.
Here is the deal now: What we want to achieve is to keep our cell to the top side of the tableview all the time, while its height is getting increased when we scroll towards bottom. Both of these requirements must happen only when the top cell is the first visible cell in the tableview.
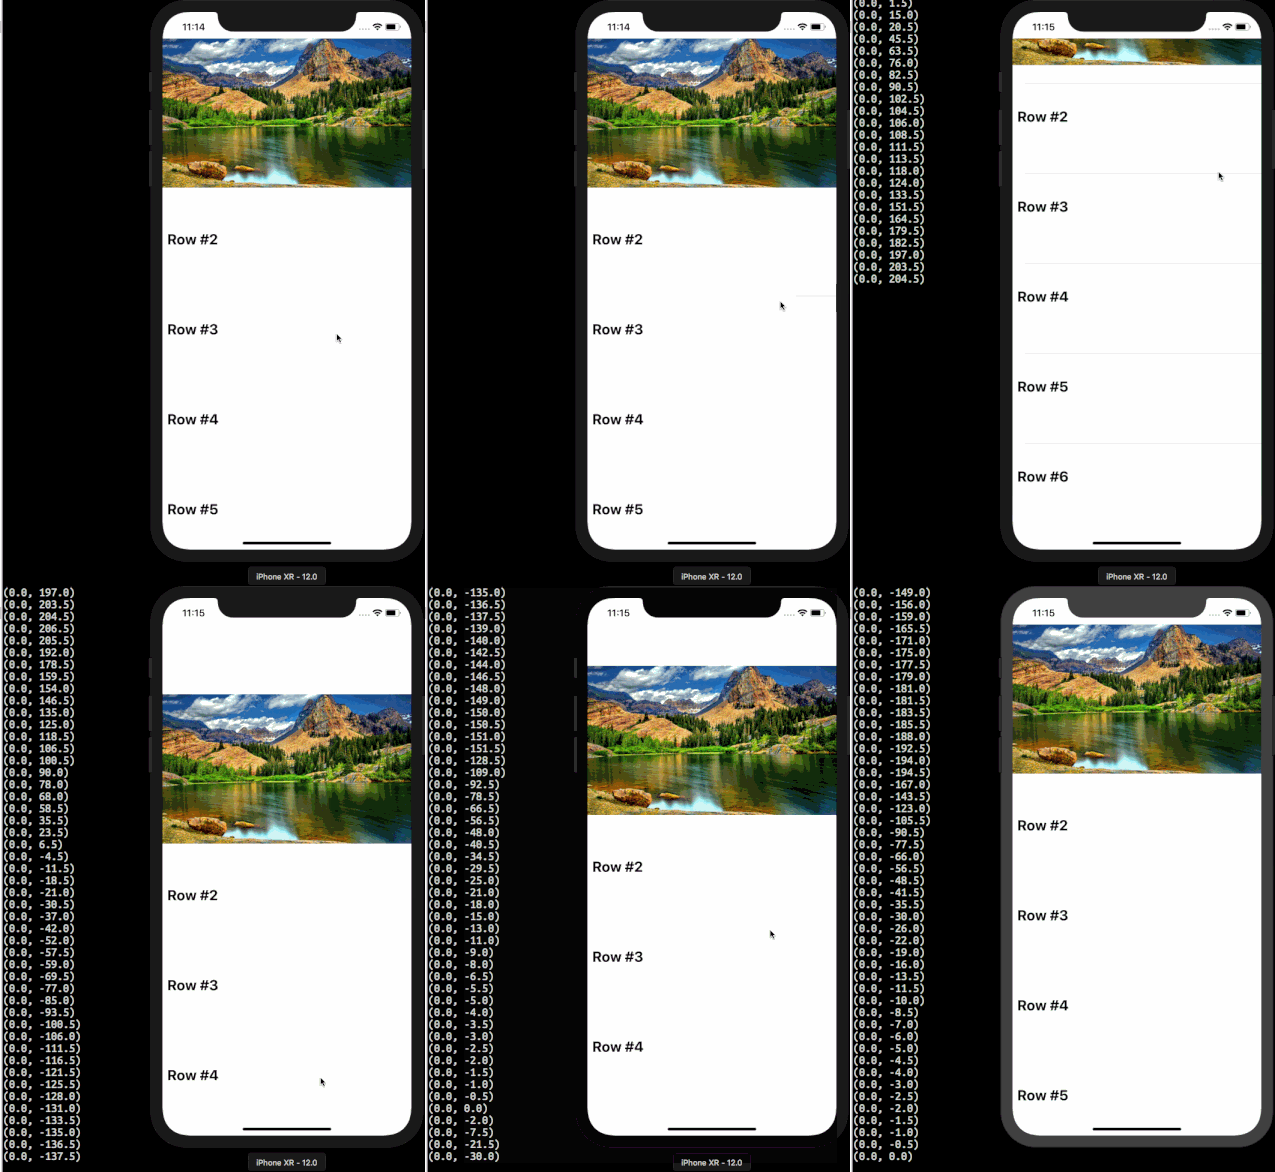
To understand how we’ll do that, let me say the following: By default, when the tableview is appearing and the cells are displayed, the content offset property of the scrollview, which is a CGPoint value, is set to zero (0.0, 0.0). When scrolling towards top, the Y value of the content offset is increased. When scrolling towards bottom, it’s decreased. And the important part:
When scrolling towards bottom but there are no more cells to show to the top (the first cell of the tableview is the first visible cell also), the content offset starts getting negative values in the vertical axis (talking about the Y part of the content offset point).
The following demonstrates all that:

As we want our effect to take place while scrolling, we must implement a specific UIScrollView delegate method: The one called scrollViewDidScroll(_:). Go to the ViewController extension where the tableview delegate and datasource methods are implemented, and add the following before the extension closing:
|
1 2 3 4 5 6 7 8 9 |
func scrollViewDidScroll(_ scrollView: UIScrollView) { if scrollView.contentOffset.y < 0.0 { if let cell = tableView.cellForRow(at: IndexPath(row: 0, section: 0)) { } } } |
Notice the condition above: The first thing we do is to check whether the contentOffset.y is negative or not, and we proceed if only it’s negative indeed.
The next line unwraps the first cell which we access through the tableview property (see the initialisation of the IndexPath where we point to the first cell by setting the row parameter value to 0).
Making the Trick: Method #1
To achieve having the first cell always being sticky to the top when scrolling down, we must update the Y origin point of its frame while scrolling and “move” it up for as much as the content offset Y value is. In other words, when the content offset Y value starts being a negative number, we assign it as the Y origin point of the cell’s frame:
|
1 2 3 |
cell.frame.origin.y = scrollView.contentOffset.y |
The above will make our first cell always stick to top when scrolling towards bottom.
The second step of the trick is to increase the cell’s height, but how much exactly? We could use the content offset Y value once again and do something like that:
|
1 2 3 |
cell.frame.size.height += scrollView.contentOffset.y * (–1.0) |
Multiplying by -1.0 makes the content offset Y a positive number.
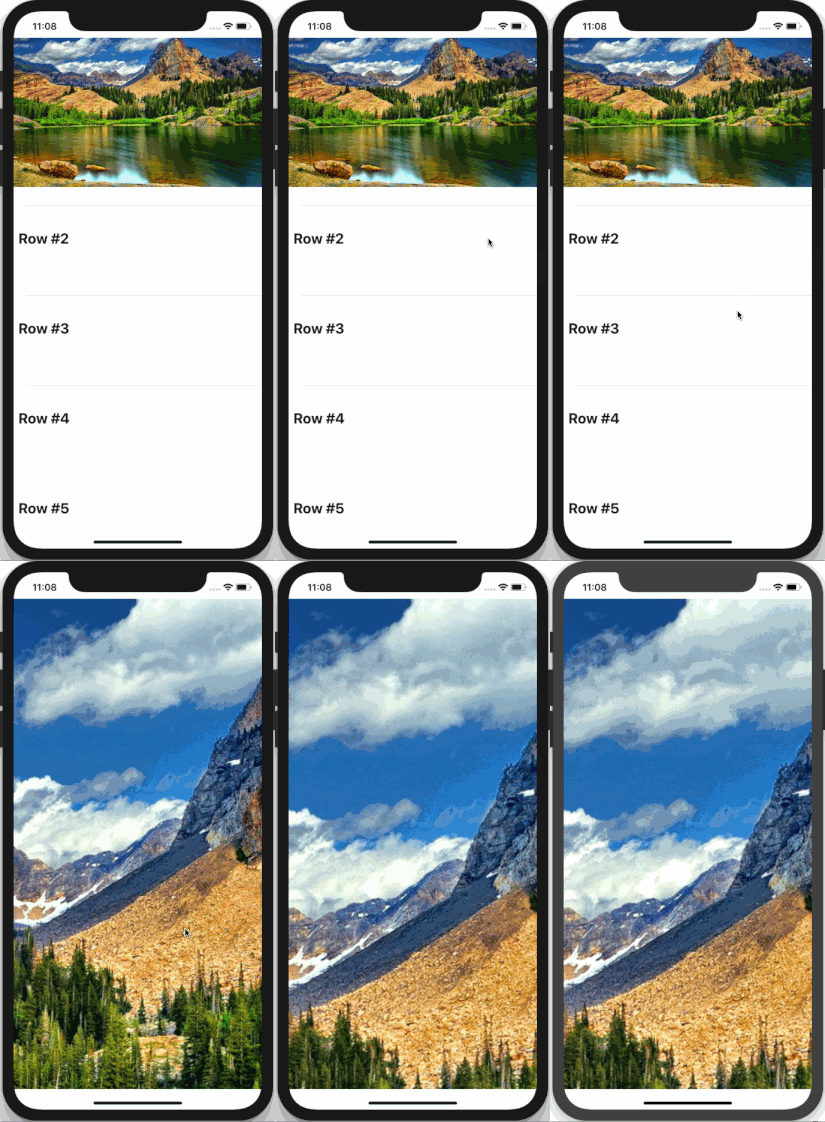
However, that would cause the following effect:

The reason for the above weird effect is this: While we are scrolling, the scrollViewDidScroll(_:) method keeps being called repeatedly, and the new content offset Y value is added to the height on every single call. For instance, when the content offset Y gets the value -100 after having scrolled for a while, the height in that case is equal to:
original_height + 1 + 2 + 3 + ... + 100
But that’s not right! We want our height to be equal to:
original_height + 100
So, to overcome this problem, let’s just add the current content offset Y value to the original height of the cell, and not to the current height:
|
1 2 3 4 5 |
let originalHeight: CGFloat = 280.0 cell.frame.size.height = originalHeight + scrollView.contentOffset.y * (–1.0) |
Now, that makes the trick! Note that the originalHeight value must be equal to the row height we set in the tableView(_:heightForRowAt:) delegate method:
|
1 2 3 4 5 6 7 8 9 10 |
func tableView(_ tableView: UITableView, heightForRowAt indexPath: IndexPath) -> CGFloat { // The first cell has a different height. if indexPath.row == 0 { return 280.0 } else { return 150.0 } } |
Here’s our solution as one piece:
|
1 2 3 4 5 6 7 8 9 10 11 |
func scrollViewDidScroll(_ scrollView: UIScrollView) { if scrollView.contentOffset.y < 0.0 { if let cell = tableView.cellForRow(at: IndexPath(row: 0, section: 0)) { cell.frame.origin.y = scrollView.contentOffset.y let originalHeight: CGFloat = 280.0 cell.frame.size.height = originalHeight + scrollView.contentOffset.y * (–1.0) } } } |
Making the Trick: Method #2
Based on the exact same logic presented already, there is an alternative implementation we can make so we get the same results. In this approach we won’t use the original height of the row. Instead, every time the content offset Y is negative:
- We’ll be calculating the difference between the current value and the value it had in the last call of the
scrollViewDidScroll(_:)(something like:currentContentOffset_Y - lastContentOffset_Y) - We’ll be adding the absolute value of that difference to the current height of the cell.
For this solution, we need to declare the following class property (most preferably at the beginning of the class along with any other property declarations):
|
1 2 3 |
var lastContentOffset = CGPoint.zero |
Now, at any given moment that the content offset Y value is negative we’ll calculate the difference as said above in the scrollViewDidScroll(_:)method:
|
1 2 3 |
let deltaY = CGFloat(fabsf(Float(scrollView.contentOffset.y)) – fabsf(Float(lastContentOffset.y))) |
“Playing” with absolute values is necessary.
The deltaY amount calculated above must be added to the current height. At the same time, the Y origin point of the cell’s frame must be decreased for as much as the current content offset value is:
|
1 2 3 |
cell.frame = CGRect(x: 0.0, y: scrollView.contentOffset.y, width: cell.frame.size.width, height: cell.frame.size.height + deltaY) |
And something important: Don’t forget to assign the current content offset to the lastContentOffset property as the last step, otherwise the lastContentOffset property will always be a zero point.
|
1 2 3 |
lastContentOffset = scrollView.contentOffset |
Here it is all together:
|
1 2 3 4 5 6 7 8 9 10 11 |
func scrollViewDidScroll(_ scrollView: UIScrollView) { if scrollView.contentOffset.y < 0.0 { if let cell = tableView.cellForRow(at: IndexPath(row: 0, section: 0)) { let deltaY = CGFloat(fabsf(Float(scrollView.contentOffset.y)) – fabsf(Float(lastContentOffset.y))) cell.frame = CGRect(x: 0.0, y: scrollView.contentOffset.y, width: cell.frame.size.width, height: cell.frame.size.height + deltaY) lastContentOffset = scrollView.contentOffset } } } |
That’s All
You can find the two ways of making this nice trick as a gist here as well. I hope you liked this quick tip! If so, spread the word about it!
