Hello and welcome back!
For a long time I wanted to write about a specific topic that surely every programmer encounters in his/her programming life. A topic not that difficult, but an important one. That is, how to scroll a textfield to a visible area of the view when it’s obscured by the keyboard and how to put it back into its original position, after the keyboard vanishes.

Of course, to accomplish something like that, it’s necessary to know when the keyboard is about to appear and when it’s about to disappear. Therefore, in this post I’m going to work with two subjects evenly important, combined in the package of one.
Let’s discuss about it for a while, beginning from the later one. Every time that the keyboard is going to be shown or to be closed, the system (iOS) sends various notifications to the app regarding each state of the keyboard. For example, such notifications are:
UIKeyboardDidShowNotificationUIKeyboardDidHideNotificationUIKeyboardWillShowNotificationUIKeyboardWillHideNotification
In this example I chose to observe the UIKeyboardDidShowNotification notification to let my app know when the keyboard is shown and the UIKeyboardWillHideNotification notification for the keyboard closing.
To make the notifications known inside the app, it’s necessary to set up observers and to specify what kind of notifications exactly we want to observe.
I strongly recommend you to take a look in the Apple Documentation about keyboard notifications. That reading will help you understand everything you need to know. Here are some useful links:
In a couple of words only, I should explain this: When we set up observers for the previously mentioned two notifications, we must also set a custom method for each notification that is going to be called when a notification arrives. That’s it and nothing more. The rest of the work takes place inside these methods. As you’ll find out by yourself, setting observers for notifications is really a matter only of a single line.
Now that we have an idea about how to know when the keyboard is shown or is hidden, it’s time to move on to the next subject. How can we manage to show a textfield into a visible area of the view, if the textfield is obscured by the keyboard? Well, that’s relatively easy too. The main idea consists of placing a scroll view on our view and adding the textfield on the scroll view. Every time the keyboard is shown, if the textfield is not visible, we make the scroll view to scroll until the textfield becomes visible. When the keyboard is closing, we set the scroll view back into its original position. Keep in mind that everything we do must work in both portrait and landscape orientation, so we have to develop our code in a way that serves every orientation.
Enough talking. Let’s go to implementation. The example project was developed in XCode 4.3 and it was tested in Simulator for the iOS 5.1.
STEP 1 – Create the project
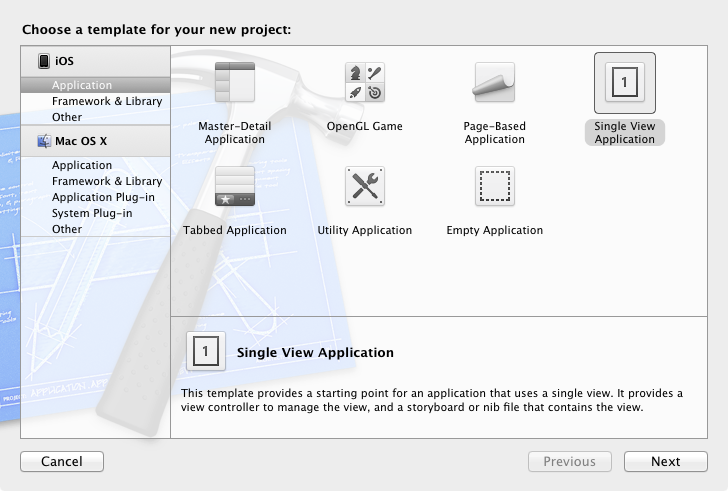
As usual, we first create the example project. Launch the Xcode and select the Single View Application as the template for the project.
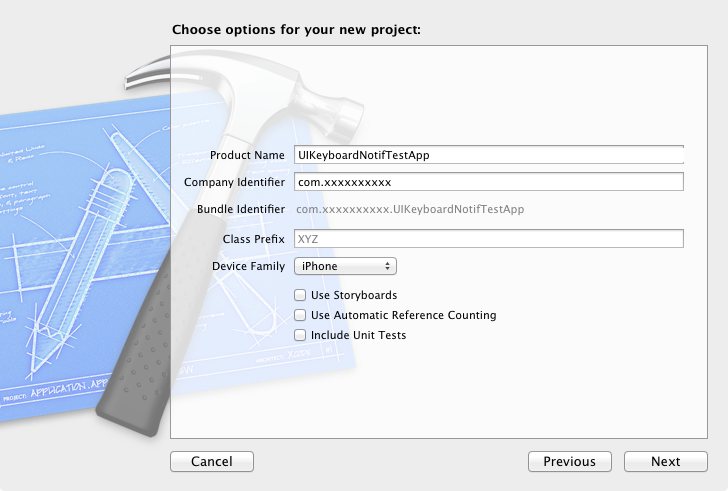
Next, provide a name for the project. I named it UIKeyboardNotifTestApp, even though we’ll do more than observing notifications.
Finally, pick a place to save and go.
STEP 2 – Setup the interface
Our interface is going to be really simple. Inside the view, we’re going to have only two elements. The scroll view and the textfield.
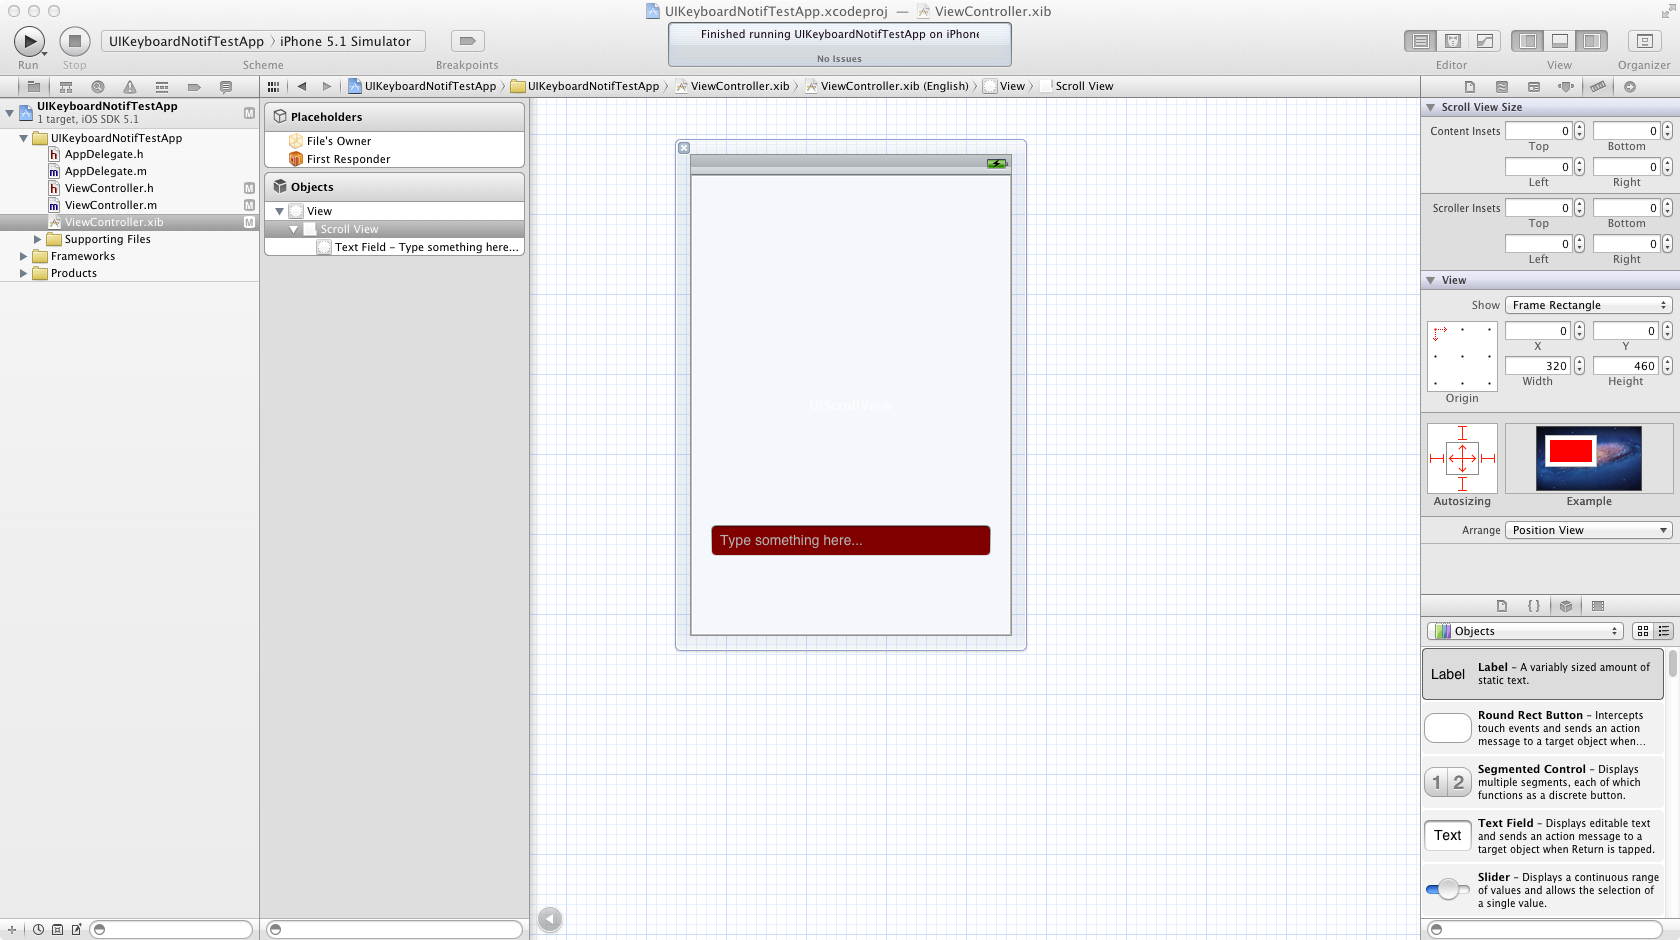
Go to the ViewController.xib and add a scroll view and a textfield inside the view. Make sure to place the textview somewhere in the bottom of the view, so it’ll be obscured by the keyboard. Note that I’m using the default view created in the Xcode, meaning a 320×460 view (the status bar exists). The view size we’re working on is important, as we’re going to “play” a little with the orientation. Take a look in my Interface Builder window:
If you want to place the textfield in the same position, here it’s frame:
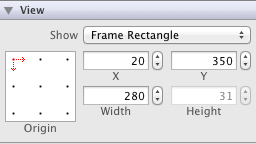
You can play around a little by changing the color to the textfield (unless you want to have everything white) and adding some text into the placeholder field.
STEP 3 – Outlets and connections
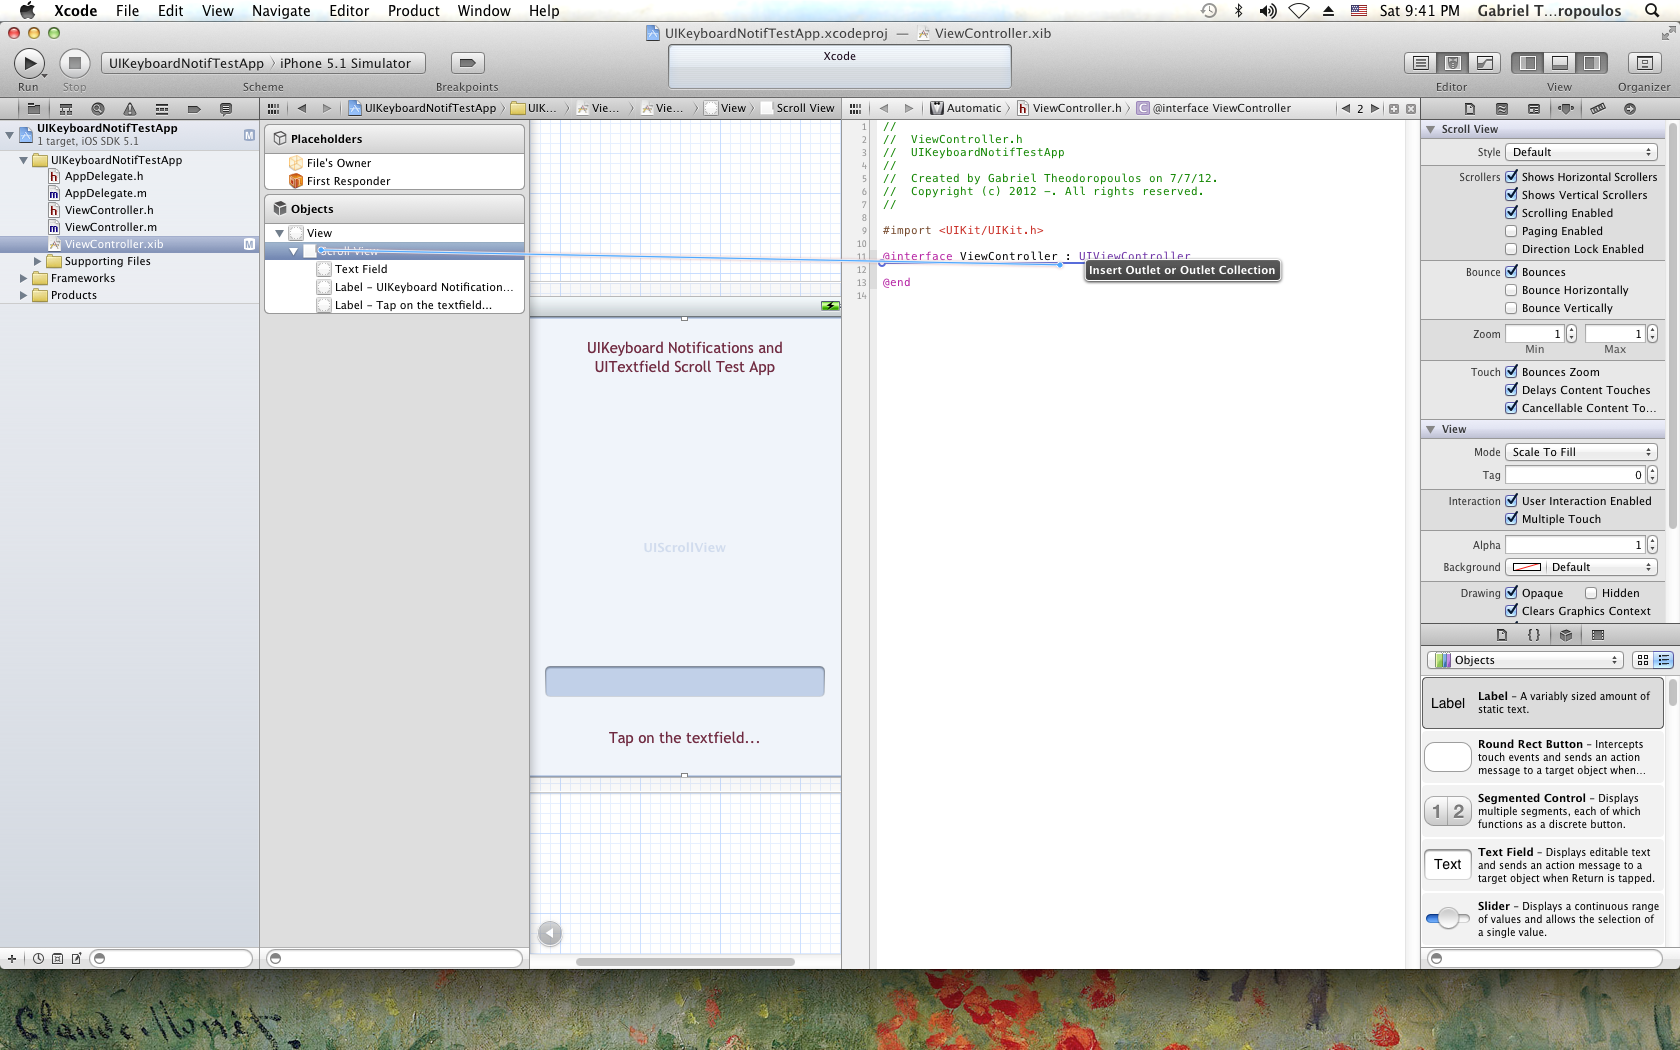
At this point we need to create two outlets, one for the scroll view and one for the textfield. Since Xcode 4, I use the drag and drop method from the Interface Builder to the .h file. Using this way the connections of the outlets to the views, synthesizations, outlet releases, etc, automatically get written. This is what I mean:
Specify a name for the outlet:

If you don’t use the method above, then you have to write everything manually. I don’t go into details, but make sure after you create the outlets to synthesize, release and connect them to the equivalent views. I named the scroll view “scroller” and the textfield “txtDemo”.
Before we move on, your ViewController.h file should look like this:
[objc]
#import <UIKit/UIKit.h>
@interface ViewController : UIViewController ,
@property (retain, nonatomic) IBOutlet UIScrollView *scroller;
@property (retain, nonatomic) IBOutlet UITextField *txtDemo;
@end
[/objc]
As you can see, we also need to add the UIScrollViewDelegate and the UITextFieldDelegate to have access to the delegate methods of the scroll view and the textfield.
STEP 4 – Let’s write some code
At the top of the ViewController.m file, inside the private interface, we’ll declare two private methods, one for each notification that we are going to observe. Also, we’ll declare a private float variable, in which we are going to store the initial content offset (the original place in other words) of the scroll view, so we can put it in its original position when the keyboard goes away. But that’s for later. For now, here is how you should make your private interface inside the .m file and before the @implementation section:
[objc]
@interface ViewController ()
@property (nonatomic) float originalScrollerOffsetY;
-(void)keyboardWasShown:(NSNotification *)notification;
-(void)keyboardWillHide:(NSNotification *)notification;
@end
[/objc]
Here we have two methods: The keyboardWasShown and the keyboardWillHide. These are custom methods and you can name them whatever you like. As you can see, we make the methods to accept just one parameter, the notification that the iOS will send. We’ll implement them later.
Let’s go inside the viewDidLoad method. There is some preparation here. At first, we need to setup the scroll view:
[objc]
// Set up the scroll view.
scroller.contentSize = CGSizeMake(320.0, 600.0);
scroller.delegate = self;
[/objc]
Initially we are in portrait mode, so the width we set in the content size is 320.0 and the height as much as you want. I set it to 600.0.
We also need to set the textfield delegate:
[objc]
// Set the txtDemo textfield delegate.
txtDemo.delegate = self;
[/objc]
If you have named the textfield somehow else, put the name you gave instead of the “txtDemo”.
The first important task now. It’s time to set the observers for the two notifications we want to receive from the iOS:
[objc]
// Add two notifications for the keyboard. One when the keyboard is shown and one when it’s about to hide.
[[NSNotificationCenter defaultCenter] addObserver:self selector:@selector(keyboardWasShown:) name:UIKeyboardDidShowNotification object:nil];
[[NSNotificationCenter defaultCenter] addObserver:self selector:@selector(keyboardWillHide:) name:UIKeyboardWillHideNotification object:nil];
[/objc]
There is not much to explain. In the first case, we set the keyboardWasShown as the custom method that will handle the UIKeyboardDidShowNotification notification when it arrives. In the second case, we set the keyboardWillHide method as the selector for the UIKeyboardWillHideNotification notification.
So, after all the above code, your viewDidLoad method should look like this:
[objc]
– (void)viewDidLoad
{
[super viewDidLoad];
// Do any additional setup after loading the view, typically from a nib.
// Set up the scroll view.
scroller.contentSize = CGSizeMake(320.0, 600.0);
scroller.delegate = self;
// Set the txtDemo textfield delegate.
txtDemo.delegate = self;
// Add two notifications for the keyboard. One when the keyboard is shown and
// one when it’s about to hide.
[[NSNotificationCenter defaultCenter] addObserver:self selector:@selector(keyboardWasShown:) name:UIKeyboardDidShowNotification object:nil];
[[NSNotificationCenter defaultCenter] addObserver:self selector:@selector(keyboardWillHide:) name:UIKeyboardWillHideNotification object:nil];
}
[/objc]
Let’s implement the two methods now, beginning from the keyboardWasShown.
Begin implementing the keyboardWasShown method and add a NSLog command:
[objc]
-(void)keyboardWasShown:(NSNotification *)notification{
NSLog(@"Keyboard is shown.");
[/objc]
Before going into deeper waters, it’s good to store in two float variables the width and the height of our main view. Why? Because if we rotate in landscape mode the Simulator or the device, then we must swap the width and the height of the view, as the width becomes height and the height becomes width.
[objc]
float viewWidth = self.view.frame.size.width;
float viewHeight = self.view.frame.size.height;
[/objc]
The next important task now. What we want from our app is to scroll the scroll view just enough to reveal the textfield into the viewable area of the screen, after the keyboard gets shown (and vice versa of course). To achieve this, we must implement five small steps:
- To get the keyboard size using the parameter’s
notificationobject. - To set the correct values for widths and heights, depending on the orientation.
- To get the frame of the remaining viewable area after the keyboard gets shown.
- To get the textfield’s frame.
- To check if the viewable area contains the textfield and scroll if it doesn’t (yes, we’ll implement this checking even though we know that the viewable area doesn’t contain our textfield).
Here we go. The notification object that the iOS sends contains a NSDictionary, named userInfo. From this, we’ll find the size of the keyboard:
[objc]
/** STEP 1 **/
// Get the size of the keyboard from the userInfo dictionary.
NSDictionary *keyboardInfo = [notification userInfo];
CGSize keyboardSize = [[keyboardInfo objectForKey:UIKeyboardFrameBeginUserInfoKey] CGRectValue].size;
[/objc]
We will store the keyboard height into a variable, because as a height we’ll set its width if the orientation is landscape.
[objc]
float keyboardHeight = keyboardSize.height;
[/objc]
Now we have to check the orientation of the device. If it’s in landscape mode, then we must swap the widths and heights as follows:
[objc]
if (UIDeviceOrientationIsLandscape([[UIDevice currentDevice] orientation])) {
keyboardHeight = keyboardSize.width;
// Also swap the view width and height.
float temp = viewWidth;
viewWidth = viewHeight;
viewHeight = temp;
}
[/objc]
Next, let’s calculate the frame of the remaining viewable area.
[objc]
CGRect viewableAreaFrame = CGRectMake(0.0, 0.0, viewWidth, viewHeight – keyboardHeight);
[/objc]
For the step 4, we get the textfield’s frame:
[objc]
CGRect txtDemoFrame = txtDemo.frame;
[/objc]
Finally, we arrive at the fifth step of what we need to do in this method. At first, we check if the viewable area contains the textfield (we know it doesn’t, but we do this to be 100% correct and to have correct code for later use). If it doesn’t, we calculate the offset point for the scroll view, we store the current offset and… scroll.
[objc]
if (!CGRectContainsRect(viewableAreaFrame, txtDemoFrame)) {
// We need to calculate the new Y offset point.
float scrollPointY = viewHeight – keyboardHeight;
// Don’t forget that the scroller should go to its original position
// so store the current Y point of the content offset.
originalScrollerOffsetY = scroller.contentOffset.y;
// Finally, scroll.
[scroller setContentOffset:CGPointMake(0.0, scrollPointY) animated:YES];
}
[/objc]
There you go! Our method is ready! As you can see, we scroll using the setContentOffsets:animated: method of the scroll view.
Let’s implement the keyboardWillHide method. Don’t worry, it’s only two lines of code:
[objc]
-(void)keyboardWillHide:(NSNotification *)notification{
NSLog(@"Keyboard is closing.");
// Move the scroll view back into its original position.
[scroller setContentOffset:CGPointMake(0.0, originalScrollerOffsetY) animated:YES];
}
[/objc]
I hope from all the previous code that you understood why we declared the originalScrollerOffsetY variable in the private section of the interface.
Are we finished? Well, not yet. Two things are remaining. At first, we need to implement the textfieldShouldReturn: delegate method, if we want the keyboard to be able to hide.
[objc]
-(BOOL)textFieldShouldReturn:(UITextField *)textField{
[txtDemo resignFirstResponder];
return YES;
}
[/objc]
What else? You can find out what else if you try to run the app now. If you keep it in portrait mode without changing the orientation, it will work perfect. But what is going to happen if you set the orientation in landscape mode? Not what we want to happen, that’s for sure. So, let’s fix it.
In every orientation we need two things to be correct. The content size of the scroll view and the initial position of the textfield (you cannot have the textfield in the same position in both portrait and landscape modes). Go to the shouldAutorotateToInterfaceOrientation: method that it automatically produced by the Xcode and add this code:
[objc]
if (interfaceOrientation == UIInterfaceOrientationPortrait ||
interfaceOrientation == UIInterfaceOrientationPortraitUpsideDown) {
NSLog(@"Portrait orientation.");
// Set the scroller’s content size.
scroller.contentSize = CGSizeMake(320.0, 600.0);
// Set the original frame of our textfield, centered on the screen.
[txtDemo setFrame:CGRectMake(20.0, 350.0, 280.0, 31.0)];
}
else{
NSLog(@"Landscape orientation");
// Set the scroller’s content size.
scroller.contentSize = CGSizeMake(480.0, 600.0);
// Set the original frame of our textfield, centered on the screen.
// Don’t forget that in landscape mode the height of the screen is considered as the width.
// The value 140.0 is the textfield’s width/2 (280.0/2).
[txtDemo setFrame:CGRectMake([UIScreen mainScreen].bounds.size.height / 2 – 140.0, 200.0, 280.0, 31.0)];
}
[/objc]
Also, comment or delete this line at the end of the method:
[objc]
return (interfaceOrientation != UIInterfaceOrientationPortraitUpsideDown);
[/objc]
and write this one:
[objc]
return YES;
[/objc]
Here is the method completed:
[objc]
– (BOOL)shouldAutorotateToInterfaceOrientation:(UIInterfaceOrientation)interfaceOrientation
{
if (interfaceOrientation == UIInterfaceOrientationPortrait || interfaceOrientation == UIInterfaceOrientationPortraitUpsideDown) {
NSLog(@"Portrait orientation.");
// Set the scroller’s content size.
scroller.contentSize = CGSizeMake(320.0, 600.0);
// Set the original frame of our textfield, centered on the screen.
[txtDemo setFrame:CGRectMake(20.0, 350.0, 280.0, 31.0)];
}
else{
NSLog(@"Landscape orientation");
// Set the scroller’s content size.
scroller.contentSize = CGSizeMake(480.0, 600.0);
// Set the original frame of our textfield, centered on the screen.
// Don’t forget that in landscape mode the height of the screen is considered as the width.
// The value 140.0 is the textfield’s width/2 (280.0/2).
[txtDemo setFrame:CGRectMake([UIScreen mainScreen].bounds.size.height / 2 – 140.0, 200.0, 280.0, 31.0)];
}
//return (interfaceOrientation != UIInterfaceOrientationPortraitUpsideDown);
return YES;
}
[/objc]
STEP 5 – Test the app
We are ready. You can test the app in the Simulator. Show and hide the keyboard, change the orientation and look how your app receives the notifications and knows when the keyboard is about to be shown or to be closed and how the hidden textfield gets revealed and returns back into its original position. Don’t forget to see the messages on the debugger too.
Here are some screenshots of it. Not much stuff, as the interface is quite simple.
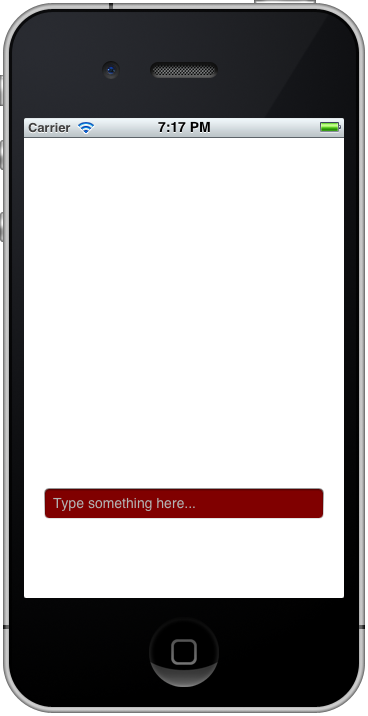
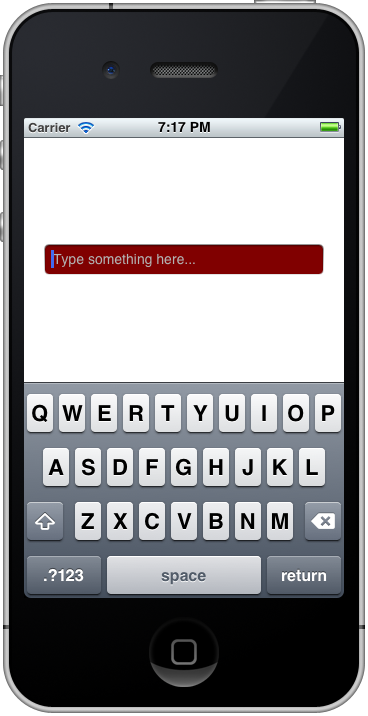
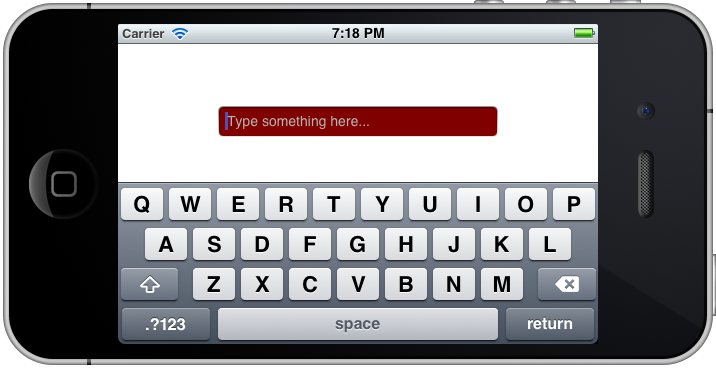
Download the project here.
This tutorial was transferred as it was originally written in my blog, therefore some techniques, tools or SDKs may have changed since then.
