So, you are just about to get finished with the new super-app of yours, or the one that your boss or a customer have asked you to make, and you realize that there’s one more important requirement, to make it capable of posting content to Facebook or Twitter. You are a breath away from the deadline, and after having spent endless hours in implementation you find it too hard, or even objectively impossible, to stay in front of your computer several more hours in order to integrate the Facebook or Twitter SDK. So, what are you supposed to do? Maybe it’s time to start thinking of twenty or more different excuses that you will use when you’ll tell your boss or the customer that you are not going to deliver the app? Maybe it’s time to start sweating or feeling suffocated? Or, on the other hand, there’s a nice and easy way to add sharing capabilities to your application in no time at all?
Well, my dear readers, hoping that nobody will ever find himself or herself to that awful situation that I just described, it indeed exists a wonderful and quick solution to that problem. Actually, this solution has a name, and it’s called Social framework, embedded in the iOS SDK. It’s quite possible that many of you have already worked with it, however, I’d bet that there are also many developers that are not aware of that framework and how to use it in order to add sharing features to an app in just a few minutes! Literally!
As you all know, Apple has added the option to post to Facebook and to Twitter as a built-in functionality in iOS since a long time ago. Obviously, it’s good enough to do the basics, but definitely you need to use the proper SDKs if you want or need to add more advanced operations to your app. In this tutorial though this is not the case. We’ll focus on the first one, and to be precise, we’ll focus on how to use the built-in post capabilities that iOS supports straight into our own application. As we are about to see next, all we’ll do is just to use the Social framework so the default post view controller become available in our demo app, and all the rest will be left to be handled by iOS. We won’t deal at all with aspects like getting logged in, acquiring authentication tokens, creating custom views, etc. Putting it simply, we will grab a “black box”, we will assemble it along with the rest of the code, and we’re good to go.
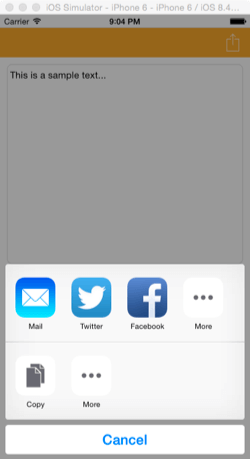
Furthermore, there is one more special controller we’ll discuss about next, named UIActivityViewController. Maybe you haven’t heard of it, but you have definitely seen and used it:

Using that controller not only you can use the built-in share options, but also you can use other features such as sending an e-mail, a SMS, printing, and other stuff. Actually, the presented options depend on the content you want to share, but still, it remains a nice tool at our disposal. Trust me, I don’t exaggerate if I tell you that it takes no more than two lines to integrate it to your app, and you’ll witness that in just a while.
So, if you are curious enough to see in action how all the above work, and if you’re already motivated to use them in your next applications, continue reading and get ready to discover simple, but yet great things. What I’m going to present you here is not new in iOS 8, but it deserves to be highlighted as it can offer great flexibility to all developers. Therefore, let’s get started.