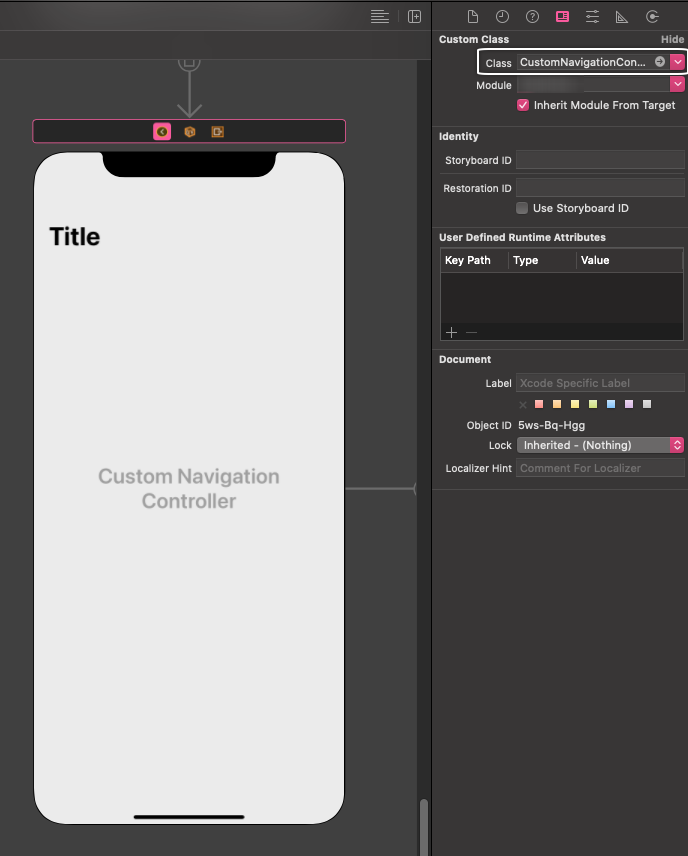
If you ever tried to manually change status bar style in navigation controller based apps (iOS 13+), then I guess that initially you bumped on a wall. And that’s because changing status bar style is not as straightforward as it might seems unfortunately.
In this short post I’ll show you how to achieve that easily and quickly. That way you’ll manage to have light or dark content even if that’s not the system’s default setting.
Before I get there, let me start with something else and simpler. In view controllers not embedded in navigation controllers, changing manually the status bar style is easy. All you have to do is to override the preferredStatusBarStyle property of the view controller:
|
1 2 3 4 5 |
override var preferredStatusBarStyle: UIStatusBarStyle { return .lightContent } |
The example above sets the lightContent style. It applies to the status bar even when light mode is the active color mode of the system.
Although that snippet is simple, don’t expect to work when a navigation controller embeds the view controller. You need to do something more, and that is to…
Subclass the
UINavigationControllerclass and override thepreferredStatusBarStyleproperty there too.
The steps
First, create a new Swift source code file. I’ve always strongly believed that this kind of tasks must have their own place as they’re quite important for other parts of the app.
For starters, import the UIKit framework, and remove the default import statement. After that create a new class that inherits from the UINavigationController class:
|
1 2 3 4 5 |
class CustomNavigationController: UINavigationController { } |
You can name your subclass any way you like. CustomNavigationController is just for demo purposes here.
Inside the body of the above class override as shown previously the preferredStatusBarStyle property:
|
1 2 3 4 5 |
override var preferredStatusBarStyle: UIStatusBarStyle { } |
Here’s the interesting part; you can return:
- either a specific style,
- or the style that the top view controller on the navigation stack specifies.
The second option is obviously more flexible, as you can have different status bar styles in different view controllers. In case a view controller does not specify a style, then we can simply return the default one determined by the system.
|
1 2 3 4 5 |
override var preferredStatusBarStyle: UIStatusBarStyle { return topViewController?.preferredStatusBarStyle ?? .default } |
Here it is altogether:
|
1 2 3 4 5 6 7 |
class CustomNavigationController: UINavigationController { override var preferredStatusBarStyle: UIStatusBarStyle { return topViewController?.preferredStatusBarStyle ?? .default } } |
From now on, you can set the CustomNavigationController as the class for any navigation controller that contains view controllers you want to override the status bar style for.

Summary
Testifying my personal experience, what I described in this post is what had worked for me among several methods that I put in action. As an additional note, in the subclass I showed above, you can also add any code related to the appearance of the navigation bar, items, title, etc. Thanks for reading!
Download a demo project that contains what I presented in this post.
You can find the above also as a gist here.