Among the most common tasks when developing macOS applications is to allow users to save data in files, and loading back from them. In order to persist the familiar experience that users already have when using their Macs, developers usually employ system provided user interfaces that allow to choose where to save or load to and from in the disk. Those standard interfaces are known as save and open panels. In this post I will show you how to configure and present both of them in a storyboard based macOS app.
There is one thing to keep in mind before keep reading; both save and open panels are not meant to store or load data to and from files respectively. Their purpose is solely to return one or more URL objects that users compose by choosing directories and file names through a graphical interface.
That being said, suppose that we have the following really simple text edit application:
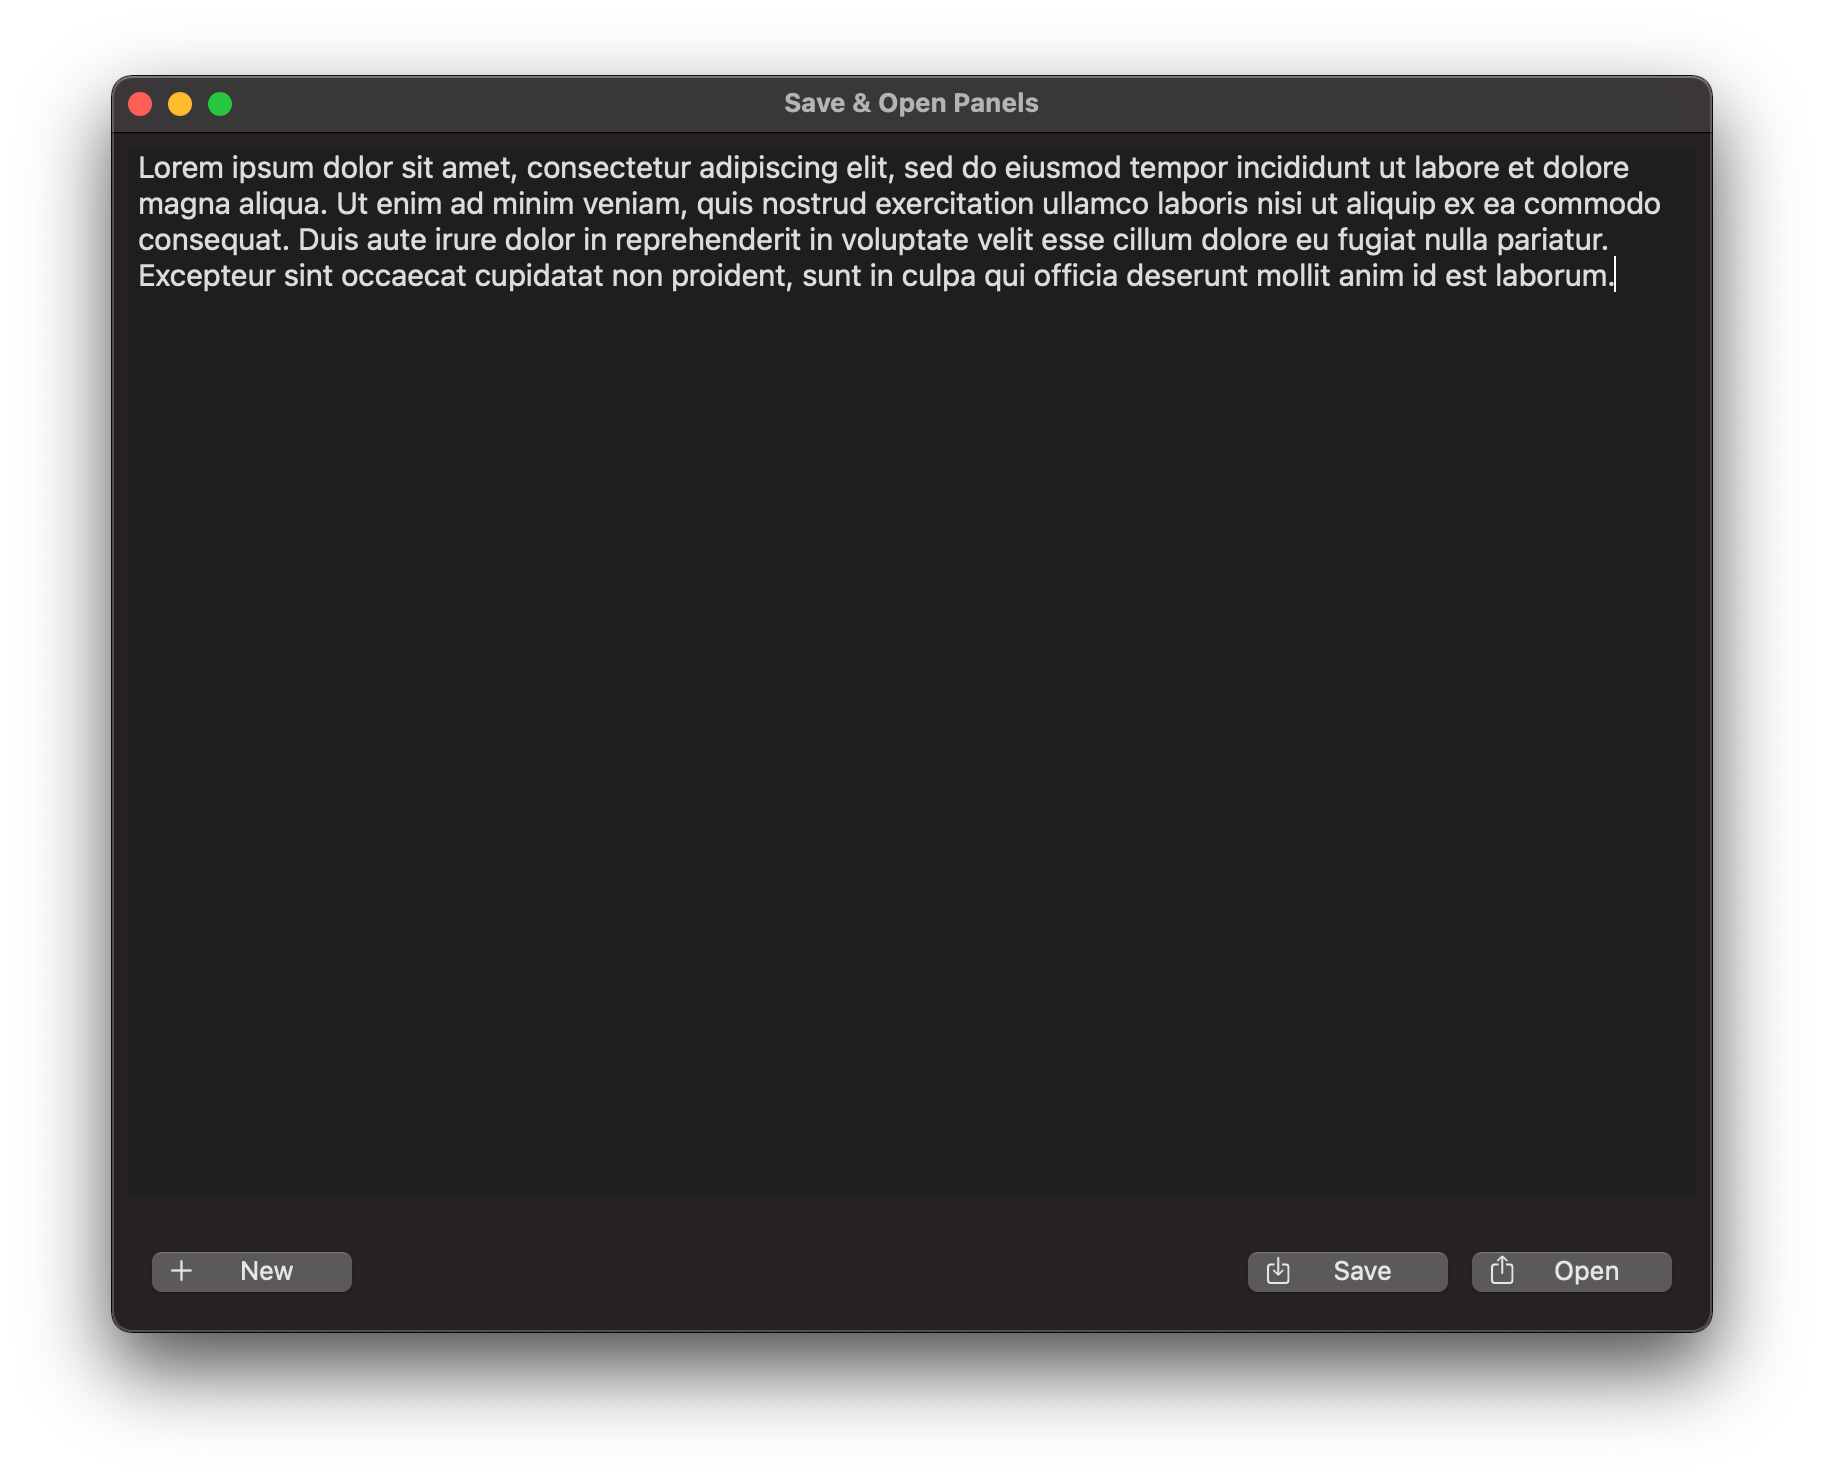
It has three buttons; one for clearing the textview and start writing from scratch, and two more for saving the current text, or loading one by opening a file in the hard drive. At the time being none of these works, and that’s what I’ll demonstrate how to fix here.
The Save panel
Focusing on the save button initially, the goal here is to present the system’s save panel in order to let users set a name and choose a target directory for the file that will be containing text from the textview.
The first step towards that is to initialize a NSSavePanel object in the method that implements the save functionality:
|
1 2 3 4 5 |
@IBAction func saveText(_ sender: Any) { let savePanel = NSSavePanel() } |
There are several properties that we can configure in the savePanel object. The first and most important one is to specify the allowed file types, meaning the kind of files that users can create. What you will actually set here depends totally on the application you are making and the kind of files it deals with. In this example I have a simple text editor, so I want to save content in plain text files with the txt extension. Here is how I indicate that:
|
1 2 3 |
savePanel.allowedFileTypes = [“txt”] |
See that the provided value to the allowedFileTypes property is an array of string values. Each value must match to the file extension of the kind of file or files we want to provide saving support for.
Sometimes declaring just the allowed file is enough, without being necessary to specify explicit values to other properties. However, there are a few more that you will definitely find interesting. The next one indicates whether users can create new folders if they need so or not through the save panel:
|
1 2 3 |
savePanel.canCreateDirectories = true |
By setting true to the above property, an additional button will appear in the save panel titled New Folder.
It’s also possible to decide whether the file extension will be visible or not next to the file name. You might want it present if you have more than one allowed file types, as extension is not visible by default:
|
1 2 3 |
savePanel.isExtensionHidden = false |
Users can type an extension along with the file name other than the expected one(s). However, such an action is prevented by default, but if you want to change it you can do so with the following property:
|
1 2 3 |
savePanel.allowsOtherFileTypes = true |
Note once again that when allowsOtherFileTypes is true then users can type any file extension they want right next to the name. Be cautious with that, especially if you’re going to give the capability of presenting an open panel for locating already stored files.
Depending on how we will present the save panel (more on that in a moment), it may have a title or not, and in any case it can display a message to users. It’s also possible to override the default Save title in the save button, and replace it with a custom prompt. Here’s how we do all that:
|
1 2 3 4 5 |
savePanel.title = “Save your text” savePanel.message = “Choose a folder and a name to store your text.” savePanel.prompt = “Save now” |
Besides those, we can also customize the displayed text next to the file name textfield, as well as the default file name. If they are not provided, Save as: and Untitled are the default values respectively:
|
1 2 3 4 |
savePanel.nameFieldLabel = “File name:” savePanel.nameFieldStringValue = “mytext” |
The above are not the only properties that we can configure in a save panel. However, they are the most common ones, and rarely you’ll ever need more than those. But if you do, Xcode auto-suggestion is your friend; it will list all properties and methods available to use.
Presenting a save panel
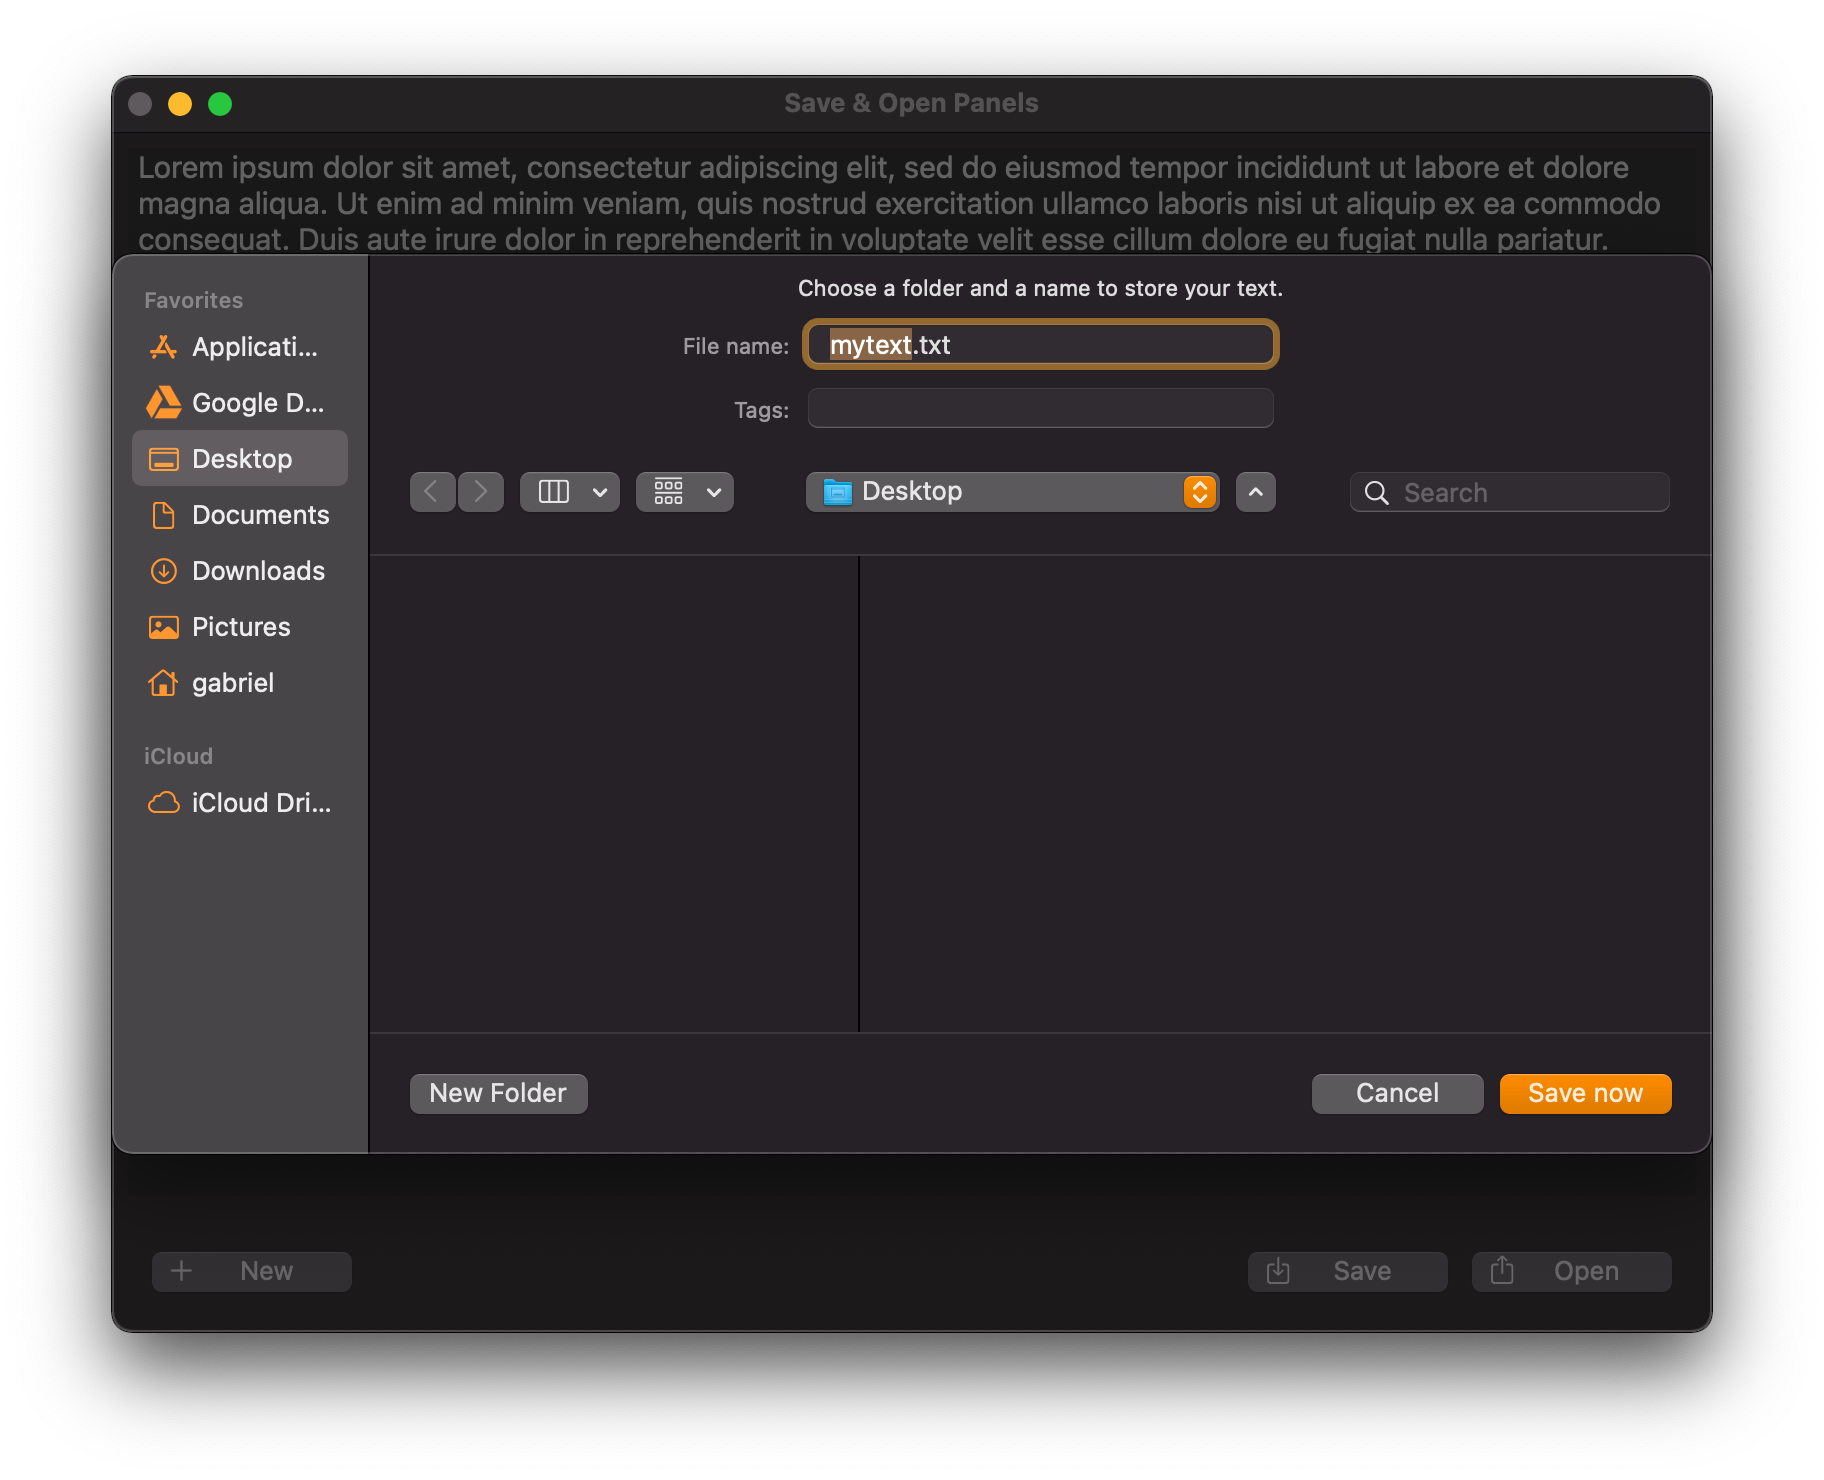
Presenting a save panel can be done in two ways; either as a modal window, or as a modal sheet. When presented as a window, the panel’s title is visible to the window’s bar. If presented as a sheet, then the title is not displayed.
Starting with the former, presenting a save panel modally as a window requires to call a method named runModal():
|
1 2 3 |
let response = savePanel.runModal() |
The returned value from that method is a NSApplication.ModalResponse object. In the above snippet, it’s stored in the response constant. It contains the button that user clicked on.
To have the save panel shown as a sheet is a bit different than as a window:
|
1 2 3 4 5 6 |
guard let window = self.view.window else { return } savePanel.beginSheetModal(for: window) { response in } |
The beginSheetModal(for:completionHandler:) method expects as first argument the window that will be presented as a sheet on. Getting the current window is done using the window property of the view controller’s view. However, that returns an optional value, so unwrapping it before using it is the proper way to go. That ensures that if for some reason the window cannot be fetched, the app will not crash; the save panel simply will not be shown. The unwrapped window object is the given value as first argument eventually.
The second argument is a completion handler; a closure that has one property only. The same response object that contains the selected by the user button.
Regardless of how the save panel will be presented, the actual goal is the same; to get the selected URL that the user has formed by providing a file name and choosing a target directory, ensuring first though that the save button was clicked. Remember that the save panel does not perform any actual saving; it’s there just to let users specify a desired directory and file name. Performing the actual save task is still up to us and depends on the kind of the data that we need to store.
Just a little bit above I demonstrated the response object that contains the user selected action. To determine if the save button was eventually clicked we can do the following:
|
1 2 3 |
guard response == .OK else { return } |
Alternatively, you can use the traditional if statement.
Next, getting the target URL is pretty easy and it’s done through the save panel instance. Note that it’s an optional value, so it must be unwrapped before used:
|
1 2 3 |
guard let saveURL = savePanel.url else { return } |
The above two guard statements can be combined into one:
|
1 2 3 |
guard response == .OK, let saveURL = savePanel.url else { return } |
Finally, if the code execution continues normally without falling to the else case, it’s time to perform the actual writing to file. In the sample case I’m demonstrating here, this is done as so:
|
1 2 3 |
try? self.textView.string.write(to: saveURL, atomically: true, encoding: .utf8) |
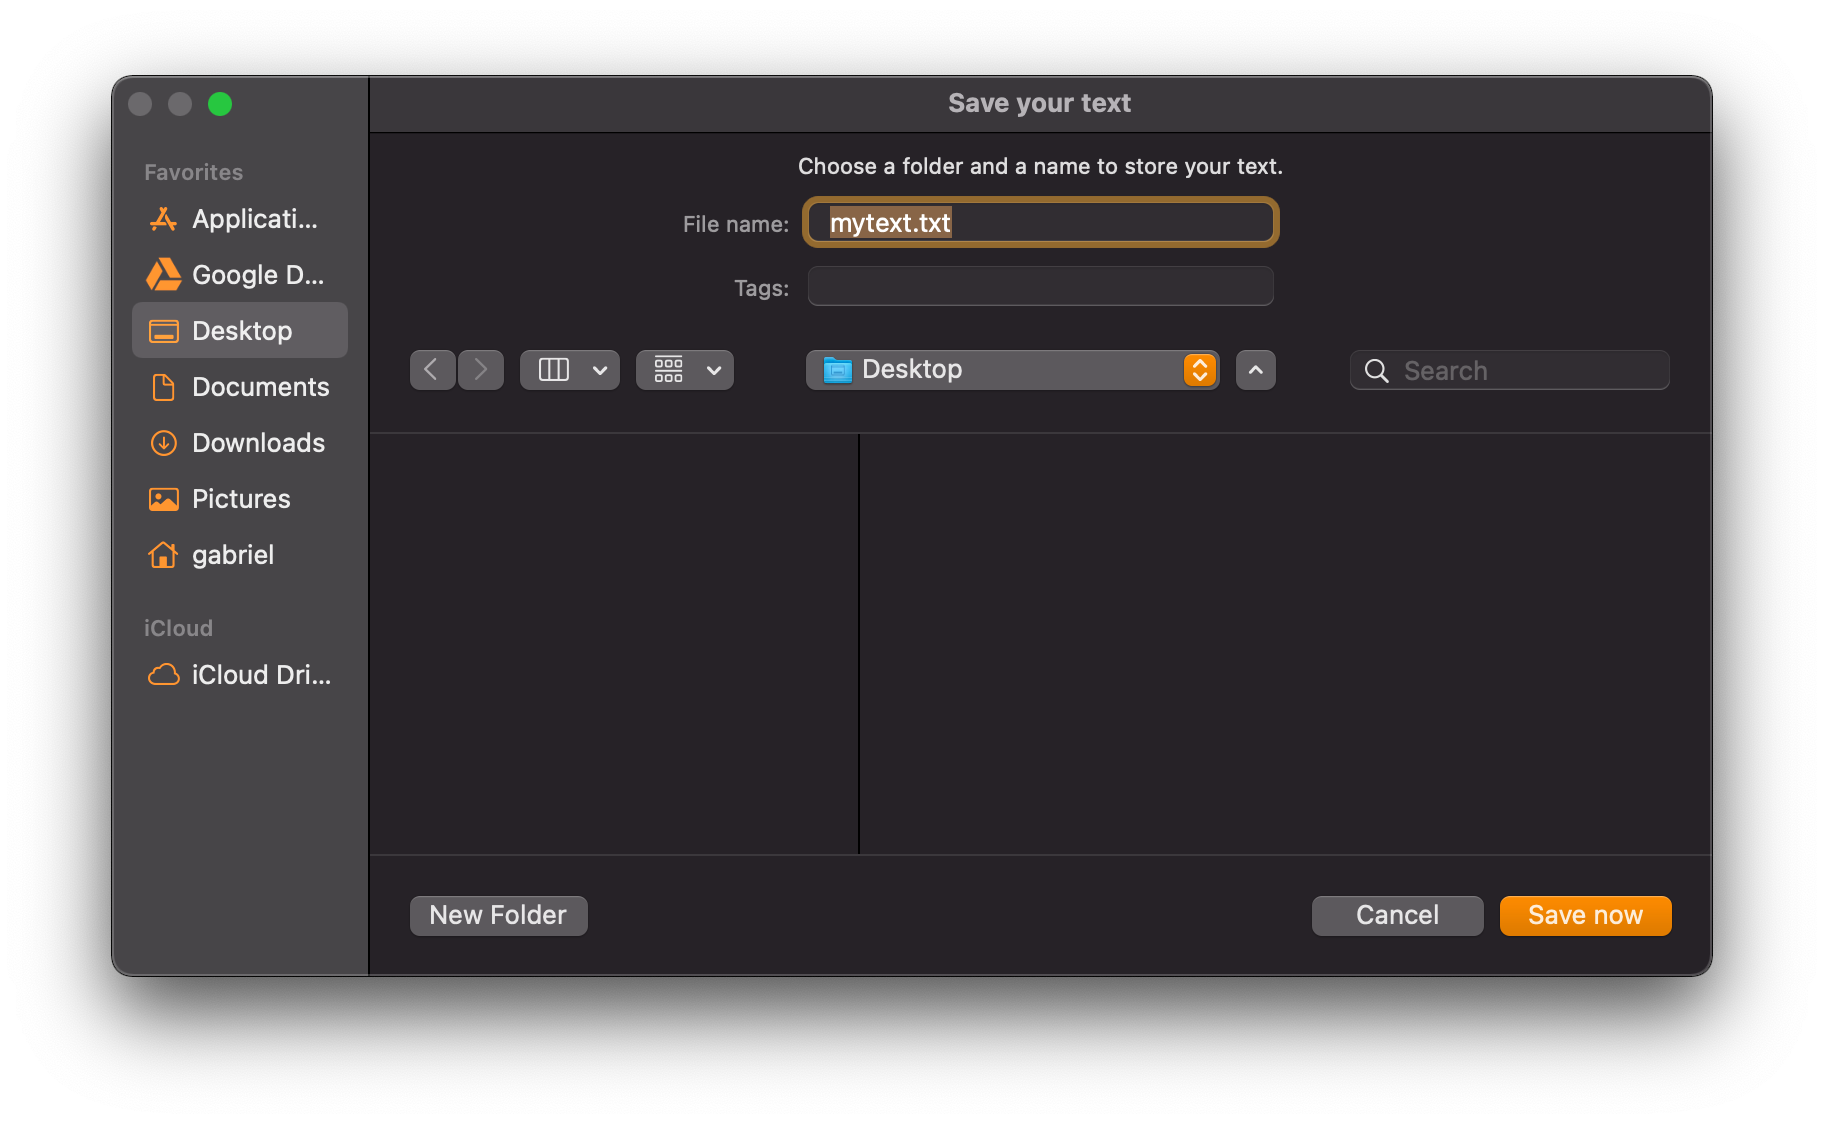
Here’s a save panel as a modal window:
The panel can be expanded or collapsed. When expanded, the additional button to create new folders is revealed, as well as the capability to navigate among folders.
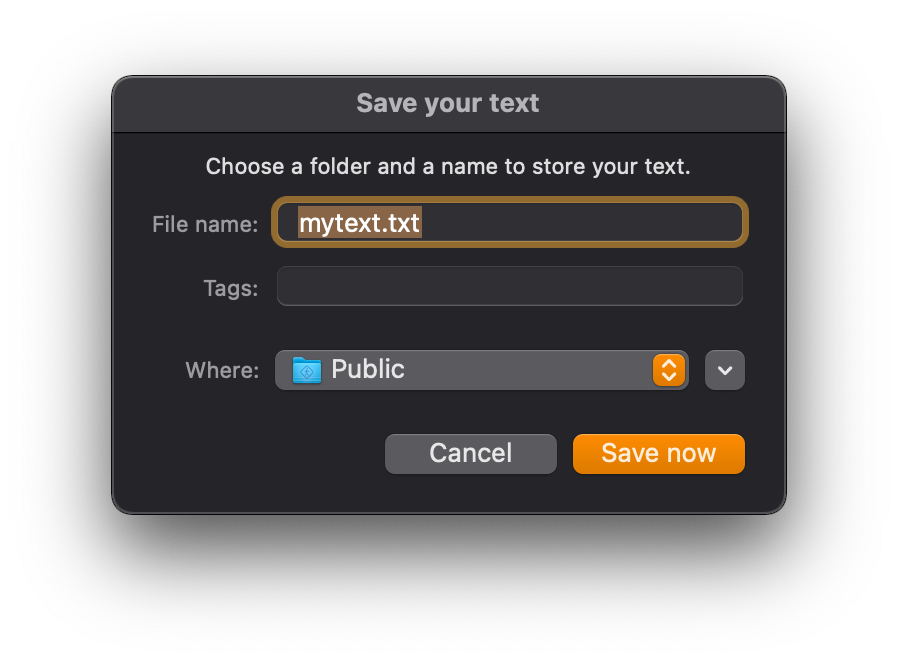
Right next you can see the save panel as a sheet:
See that it has no many differences comparing to the modal window; it’s mainly the title that’s missing. Display position is also different in macOS versions prior to Big Sur; in that case, the sheet slides in from the top side of the window, something that does not seem to be happening in Big Sur.
Right next you can find the entire demo method that implements the save panel:
|
1 2 3 4 5 6 7 8 9 10 11 12 13 14 15 16 17 18 19 |
@IBAction func saveText(_ sender: Any) { let savePanel = NSSavePanel() savePanel.allowedFileTypes = [“txt”] savePanel.canCreateDirectories = true savePanel.isExtensionHidden = false savePanel.allowsOtherFileTypes = false savePanel.title = “Save your text” savePanel.message = “Choose a folder and a name to store your text.” savePanel.prompt = “Save now” savePanel.nameFieldLabel = “File name:” savePanel.nameFieldStringValue = “mytext” // Present the save panel as a modal window. let response = savePanel.runModal() guard response == .OK, let saveURL = savePanel.url else { return } try? textView.string.write(to: saveURL, atomically: true, encoding: .utf8) } |
Important Note: Before using the save panel, it’s mandatory to assign write permissions to your app. To do that, open the Signing & Capabilities tab for your project target, and then under the App Sandbox select the Read/Write option for the User Selected File type.

The Open panel
Initializing, configuring, and finally presenting an open panel is similar to the save panel that was previously described. Some properties already shown above exist here too. There are also other properties specific to the open panel.
However, before talking about them, let’s take things from the beginning. In order to use an open panel it’s necessary to create an instance of it first. At the majority of the cases, you will need to specify the allowed file types that can be selected through the panel using the allowedFileTypes property that we met before:
|
1 2 3 4 5 6 |
@IBAction func openText(_ sender: Any) { let openPanel = NSOpenPanel() openPanel.allowedFileTypes = [“txt”] } |
Now, among the various properties we can access through the NSOpenPanel instance there are some that we need to specify more often than others. The first one indicates whether users are allowed to select multiple files or not. If so, then multiple URLs are returned by the panel, otherwise it’s just a single URL object. The following command disables multiple file selection:
|
1 2 3 |
openPanel.allowsMultipleSelection = false |
Besides that, and depending on the app you are making, you might want to let users select entire directories, or just prevent them from doing so:
|
1 2 3 |
openPanel.canChooseDirectories = false |
Similarly, we can specify if selecting files will be allowed or not. That property can be combined with the previous one in order to allow selection of a specific kind of items only:
|
1 2 3 |
openPanel.canChooseFiles = true |
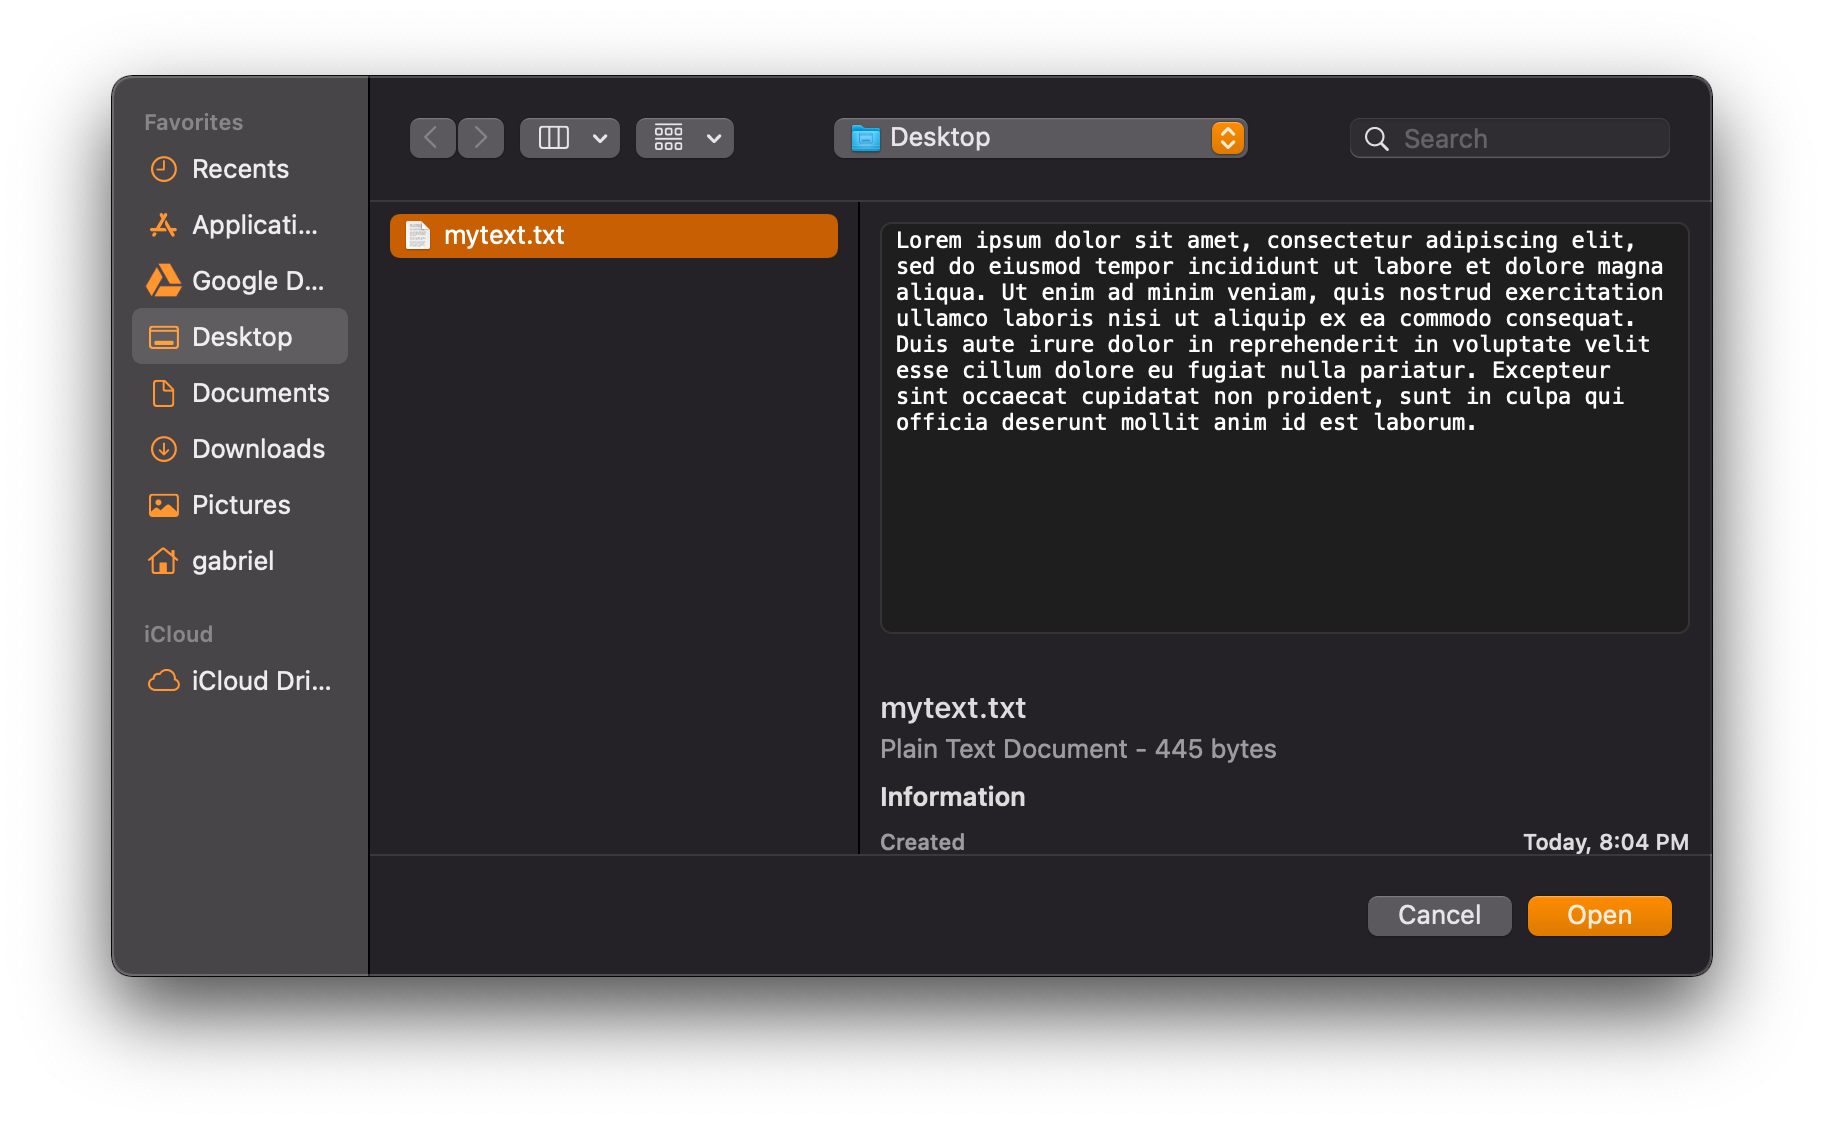
Besides the open panel’s configuration, the ways it can be presented are exactly the same to those I discussed about the save panel. It can be shown either as a modal window, or as a modal sheet. Right below I’m presenting it as a window, and requesting for a single URL. Then, I load the file contents to the text view:
|
1 2 3 4 5 |
let response = openPanel.runModal() guard response == .OK, let loadURL = openPanel.url else { return } try? textView.string = String(contentsOf: loadURL) |
If you allow multiple file selection and you want to get back all URLs selected by the user, then instead of the url property shown above, use the urls; it returns an array of URL objects:
|
1 2 3 |
guard let selectedURLs = openPanel.urls else { return } |
The entire demonstrative method implementation is this:
|
1 2 3 4 5 6 7 8 9 10 11 12 |
@IBAction func openText(_ sender: Any) { let openPanel = NSOpenPanel() openPanel.allowedFileTypes = [“txt”] openPanel.allowsMultipleSelection = false openPanel.canChooseDirectories = false openPanel.canChooseFiles = true let response = openPanel.runModal() guard response == .OK, let loadURL = openPanel.url else { return } try? textView.string = String(contentsOf: loadURL) } |
Summary
Presenting a save or an open panel is an easy job that involves standard steps in order to achieve it. In this post I mentioned the most common properties one can set, but feel free to explore what other options exist there for you. Lastly, keep in mind that both panels consist of a basic experience that users are well familiar with, so don’t hesitate to use them whenever it’s appropriate to let users choose save locations or select files to open.
You can download the sample project demonstrated in this post from this link.