SwiftUI simplifies the way we build user interfaces across Apple platforms. It provides a large set of tools to use, such as built-in views and view modifiers, with the contentMargins modifier being among them. Introduced in iOS 17, it allows to inset content within scrollable views like ScrollView, List and TextEditor, resulting in cleaner layouts and a smoother user interface overall. This post shows how to use contentMargins modifier and demonstrates its effects, so read on to find out more.
Using the contentMargins view modifier
First and foremost, contentMargins view modifier creates space around content, just like padding does. But unlike to it, contentMargins does not apply to each individual view. Instead, it affects all views that exist as content in a scrollable view.
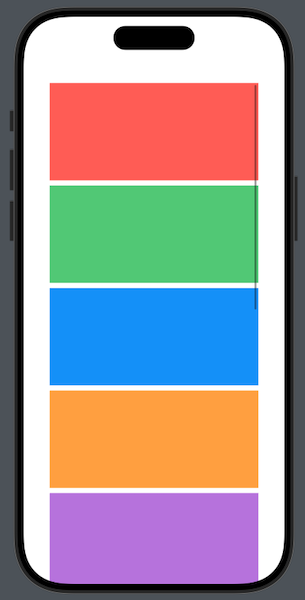
To see how it works, let’s consider for starters the following small SwiftUI view that presents a series of colors in a scrollview:
|
1 2 3 4 5 6 7 8 9 10 11 12 13 14 15 16 |
struct ContentView: View { var colors: [Color] = [.red, .green, .blue, .orange, .purple, .teal, .indigo, .mint, .pink, .yellow] var body: some View { ScrollView { ForEach(colors, id: \.self) { color in color .opacity(0.8) .frame(height: 150) } } } } |
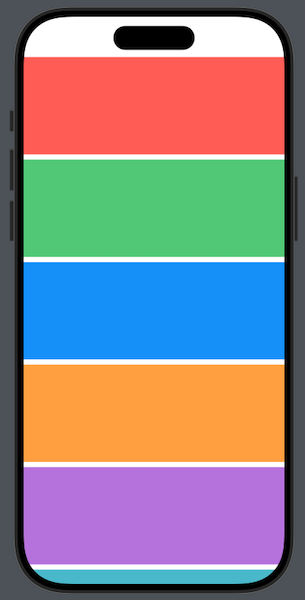
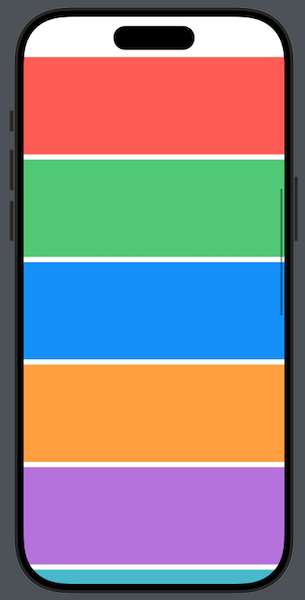
See that each color occupies all the available width in the scrollview. With contentMargins modifier we can change that easily, and create some spacing (margin) around each color view like so:
|
1 2 3 4 5 6 |
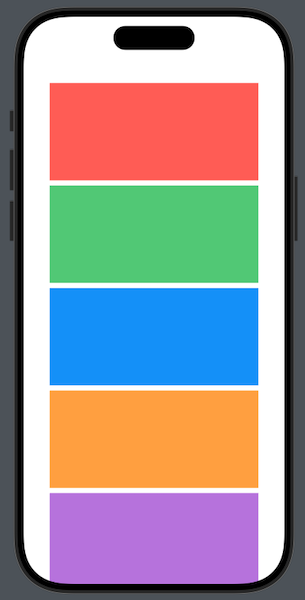
ScrollView { … } .contentMargins(40) |
Notice that contentMargins is attached to the scrollview directly and not to its content views. In the above example, a margin of 40 points will be added around the entire content; top, bottom, leading, trailing.
It’s also possible to specify just one axis to add margins, by providing it as a first argument:
|
1 2 3 4 5 6 |
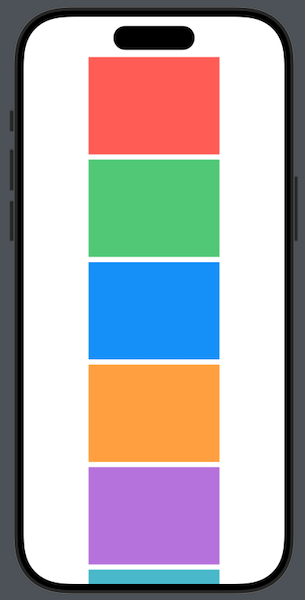
ScrollView { … } .contentMargins(.horizontal, 100) |
Even more, we can specify a single edge if needed:
|
1 2 3 4 5 6 |
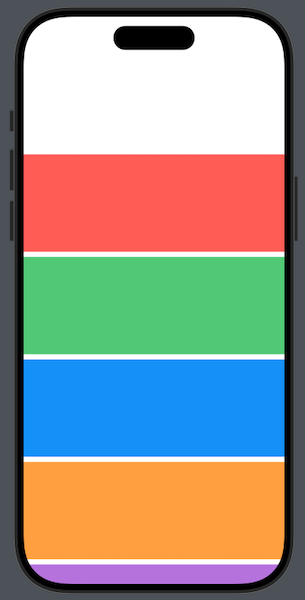
ScrollView { … } .contentMargins(.top, 150) |
Setting a placement
If you try any of the above out, you will notice that the scroll indicator follows the new positioning of the content, sticking always to its trailing edge:
We can override that default behavior by specifying a placement; the part of the view to inset. There are two values to choose from in addition to the automatic behavior that applies to all previous examples:
scrollContentscrollIndicators
In the following configuration, contentMargins adds margin around the content only, leaving the scroll indicator to its original place in the trailing edge of the view. That’s mostly useful when presenting content in large screens, where adding margins improves the UI, but the scroll indicator (scrollbar) would be better to stick to its original position:
|
1 2 3 4 5 6 |
ScrollView { … } .contentMargins(40, for: .scrollContent) |

Of course, a specific placement and an edge (or axis) can exist together in the same call of contentMargins. For instance, the following will inset only the content horizontally, while the scroll indicator will remain in its original place:
|
1 2 3 |
.contentMargins(.horizontal, 40, for: .scrollContent) |
The second option for placement regards the scroll indicator. With it, the actual content remains intact, but the scrollbar acquires spacing to either all or specific edges. In the next example, we set margins for the scroll indicator in the vertical axis only:
|
1 2 3 4 5 6 |
ScrollView { … } .contentMargins(.vertical, 200, for: .scrollIndicators) |
Note that contentMargins modifier can by applied conditionally, based, for example, on the device type or the size class. You may want to set margins when the app runs on iPad but not on iPhone, or set margins for regular size class and not for compact. For example:
|
1 2 3 |
.contentMargins(.horizontal, UIDevice.current.userInterfaceIdiom == .pad ? 100 : 0) |
Conclusion
Even though contentMargins view modifier is easy to use, you might need to get the hang of it at first until you realize how it affects content. Keep in mind that it works with scrollable views only and has overall effect to all contained views. And with no doubt, it’s a great tool to have in addition to padding in order to add spacing around our views.
Thank you for reading, take care!