Back in time I had written a post about sheets in SwiftUI, discussing how to present and work with them. Although the content of that tutorial remains valid, new interesting additions to sheets were introduced in WWDC 2022 that definitely deserve a new post to talk about them.
Given that a sheet is a system provided view, the customization options available at our disposal are limited, or at least, used to be when it comes to the sheet’s height. Starting from iOS 16, we gain the control of it in SwiftUI, becoming able to present modal content not only in full, but also in half, even in custom height. The cherry on the cake is the option to modify the height on the fly programmatically if necessary.
Let’s get familiar with all that by going through a practical example, where we’ll meet the few bits of code needed to change a sheet’s height.
Presenting a sheet
We’ll start off by declaring the following state property in a brand new SwiftUI view; its purpose is to control the presented state of the sheet:
|
1 2 3 4 5 6 7 |
struct ContentView: View { @State private var showSheet = false var body: some View { … } } |
In the view’s body we’ll have one button only that will be setting true to the showSheet property. This will trigger the sheet’s appearance:
|
1 2 3 4 5 6 7 |
var body: some View { Button(“Show Sheet”) { showSheet = true } } |
To show the sheet we’ll modify the button with the sheet(isPresented:content:) view modifier, supplying the binding value of showSheet as argument:
|
1 2 3 4 5 6 |
Button(“Show Sheet”) { … } .sheet(isPresented: $showSheet) { } |
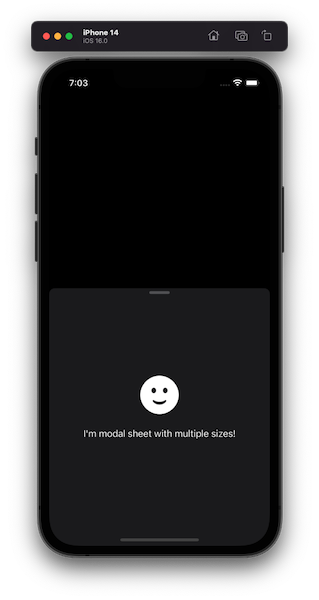
What we’ll add as content to the sheet has no real importance here. For the demonstration purposes, we’ll add a VStack which will contain in turn an Image view with an SF Symbol as image, and a Text view:
|
1 2 3 4 5 6 7 8 9 10 11 12 13 |
.sheet(isPresented: $showSheet) { VStack { Image(systemName: “smiley”) .resizable() .scaledToFit() .frame(height: 68) Text(“I’m modal sheet with multiple sizes!”) .padding(.top) } } |
The above are the few necessary steps to present a sheet from scratch, and it works as expected if you run it. Before we get to the actual point of this post, here’s the entire initial implementation performed here:
|
1 2 3 4 5 6 7 8 9 10 11 12 13 14 15 16 17 18 19 20 21 22 |
struct ContentView: View { @State private var showSheet = false var body: some View { Button(“Show Sheet”) { showSheet = true } .sheet(isPresented: $showSheet) { VStack { Image(systemName: “smiley”) .resizable() .scaledToFit() .frame(height: 68) Text(“I’m modal sheet with multiple sizes!”) .padding(.top) } } } } |
Presenting sheet using predefined sizes
In order to change the default large height of a sheet into a different predefined value, there is a view modifier to use in the outermost view inside the sheet’s content closure called presentationDetents(_:). The argument we should provide it with is a Set with values of a new type named PresentationDetent.
There are two predefined values that specify the height of a sheet; large, which is the one used by default, and medium that assigns approximately the half height of the screen to the sheet. In the following snippet you can see the presentationDetents(_:) modifier with the medium presentation detent value:
|
1 2 3 4 |
VStack { … } .presentationDetents([.medium]) |
See that the sheet does not cover the (almost) full height of the screen any more when presented. But also notice that it does not change its size even if we try to pull it towards up. That’s natural, as the medium presentation detent is the only one applied, so the sheet will stick to that height.
Note: The above does not apply when presenting the sheet in compact sizes, such as in iPhone devices in landscape mode.
You might have spotted in the above demonstration that the indicator to drag the sheet is missing. It’s possible to force its appearance and disappearance by using a different view modifier called presentationDragIndicator(_:) as shown next:
|
1 2 3 4 5 |
VStack { … } .presentationDetents([.medium]) .presentationDragIndicator(.visible) |
The visible value makes the drag indicator being present always. To achieve the opposite result, pass .hidden as argument instead.
To allow a sheet to switch from medium to large and the opposite, we need to provide both medium and large values to presentationDetents(_:) view modifier:
|
1 2 3 4 |
VStack { … } .presentationDetents([.medium, .large]) |
Note that when both these presentation detents are specified, the drag indicator is visible by default.
Presenting sheet using custom sizes
Besides the two system provided presentation detents that were discussed in the previous part, it’s also possible to specify custom height for the presented sheet using two other PresentationDetent values. With the first one we can provide a hardcoded explicit height, managing to make the sheet that way as long or as short as we desire:
|
1 2 3 4 |
VStack { … } .presentationDetents([.height(200)]) |
The above sets the sheet’s height to 200 points, which when run, will result to this:
With the second PresentationDetent value we are able to specify the height as a fraction of the available screen height. The values provided should be in the range 0.0…1.0:
|
1 2 3 4 |
VStack { … } .presentationDetents([.fraction(0.8)]) |
The fraction(0.8) value sets the sheet’s height to 80% of the screen’s height as you can see next:
Even though the various PresentationDetent values are presented one by one here, it’s perfectly fine to contain more than one in the first argument of presentationDetents(_:) view modifier. For instance, the following specifies both a fraction of the available height, and the large value together:
|
1 2 3 4 |
VStack { … } .presentationDetents([.fraction(0.8), .large]) |
Of course, more presentation detent values can be given as well:
|
1 2 3 4 |
VStack { … } .presentationDetents([.height(200), .fraction(0.8), .large]) |
Note: The order that PresentationDetent values are provided does not play any role to the height that the sheet will use at presentation time. It will always appear using the smallest height among all, even if that’s not the first one in the given collection of values. For example, the .presentationDetents([.fraction(0.8), .height(200), .large]) where the .height(200) comes second in the row will have the same result as above.
Changing sheet’s height on the fly programmatically
With the presentationDetents(_:) view modifier we can set a height for the sheet other than the default one. But what makes it really interesting is a method overload that accepts an additional argument; the currently applied presentation detent, which we can change on the fly. That is the presentationDetents(_:selection:) view modifier.
To see an example of that, we’ll declare the following two new properties in the view:
|
1 2 3 4 5 6 7 8 |
struct ContentView: View { @State private var currentPresentationDetent: PresentationDetent = .medium let presentationDetents: [PresentationDetent] = [.large, .medium, .fraction(0.8), .height(200)] … } |
The first one is a state property, the value of which indicates the current (and default in this example) presentation detent. The second is an array containing some random presentation detent values that we’ll choose from.
Next, let’s make an addition to the sheet’s contents, appending a Menu view to the VStack right after everything else:
|
1 2 3 4 5 6 7 8 9 10 11 12 13 14 15 |
.sheet(isPresented: $showSheet) { VStack { … Menu(“Change my size…”) { ForEach(presentationDetents, id: \.self) { presentationDetent in Button(title(for: presentationDetent)) { currentPresentationDetent = presentationDetent } } } } } |
The above few lines of code create a Menu that uses a ForEach container view to enumerate all values in the presentationDetents array. The important part here is that when a selection is made, the currentPresentationDetent property gets the value matching to the tapped menu item, resulting to a change in the sheet’s height.
The latter though does not work yet. Before we get to that, here’s the implementation of the assistive title(for:) method shown above and returns the title of each button based on each presentationDetent value:
|
1 2 3 4 5 6 7 8 9 10 11 |
func title(for presentationDetent: PresentationDetent) -> String { switch presentationDetent { case .medium: return “Medium” case .large: return “Large” case .height(200): return “Custom Height” case .fraction(0.8): return “Fraction” default: return “” } } |
Time to use the presentationDetents(_:selection:) view modifier in the VStack and make it possible to change the sheet height on the fly:
|
1 2 3 4 5 |
VStack { … } .presentationDetents(Set<PresentationDetent>(presentationDetents), selection: $currentPresentationDetent) |
The first argument in the modifier is expected to be a Set, however presentationDetents property is an array. So, initializing a set using that array is mandatory. The second argument is the binding value of the currentPresentationDetent state property. When that value is modified, the sheet’s height will be changed accordingly.
Conclusion
Presenting sheets of various heights in SwiftUI is eventually possible, and it doesn’t take any considerable effort to achieve it. Being able to control and change a sheet’s height can be useful in many circumstances, especially if that’s something that has to be done on the fly. The only downside is that everything discussed in this post about the concept of presentation detents is available in iOS 16 and above, as well as macOS 13 and above, and unfortunately it does not provide backwards compatibility. Regardless, it’s a great capability that will definitely become quite handy!
Thanks for reading! ????