The inspector view is not new as a concept, as we all know it from a broad range of apps mostly in macOS. Xcode, Pages and Keynote are just some of the apps that contain an inspector view. It appears on demand on the right side (the exact opposite of the sidebar), containing additional content to the main one. It usually makes sense to use inspector in macOS and iPadOS apps, where there’s enough available screen space. In compact horizontal size classes, like iPhones in portrait orientation, the inspector is presented automatically as a sheet. SwiftUI makes it possible to present the inspector view as of macOS 14 and iOS 17 with a view modifier. In this post we’ll meet it, and we’ll explore some useful details one needs to know in advance.
☝️ Note:
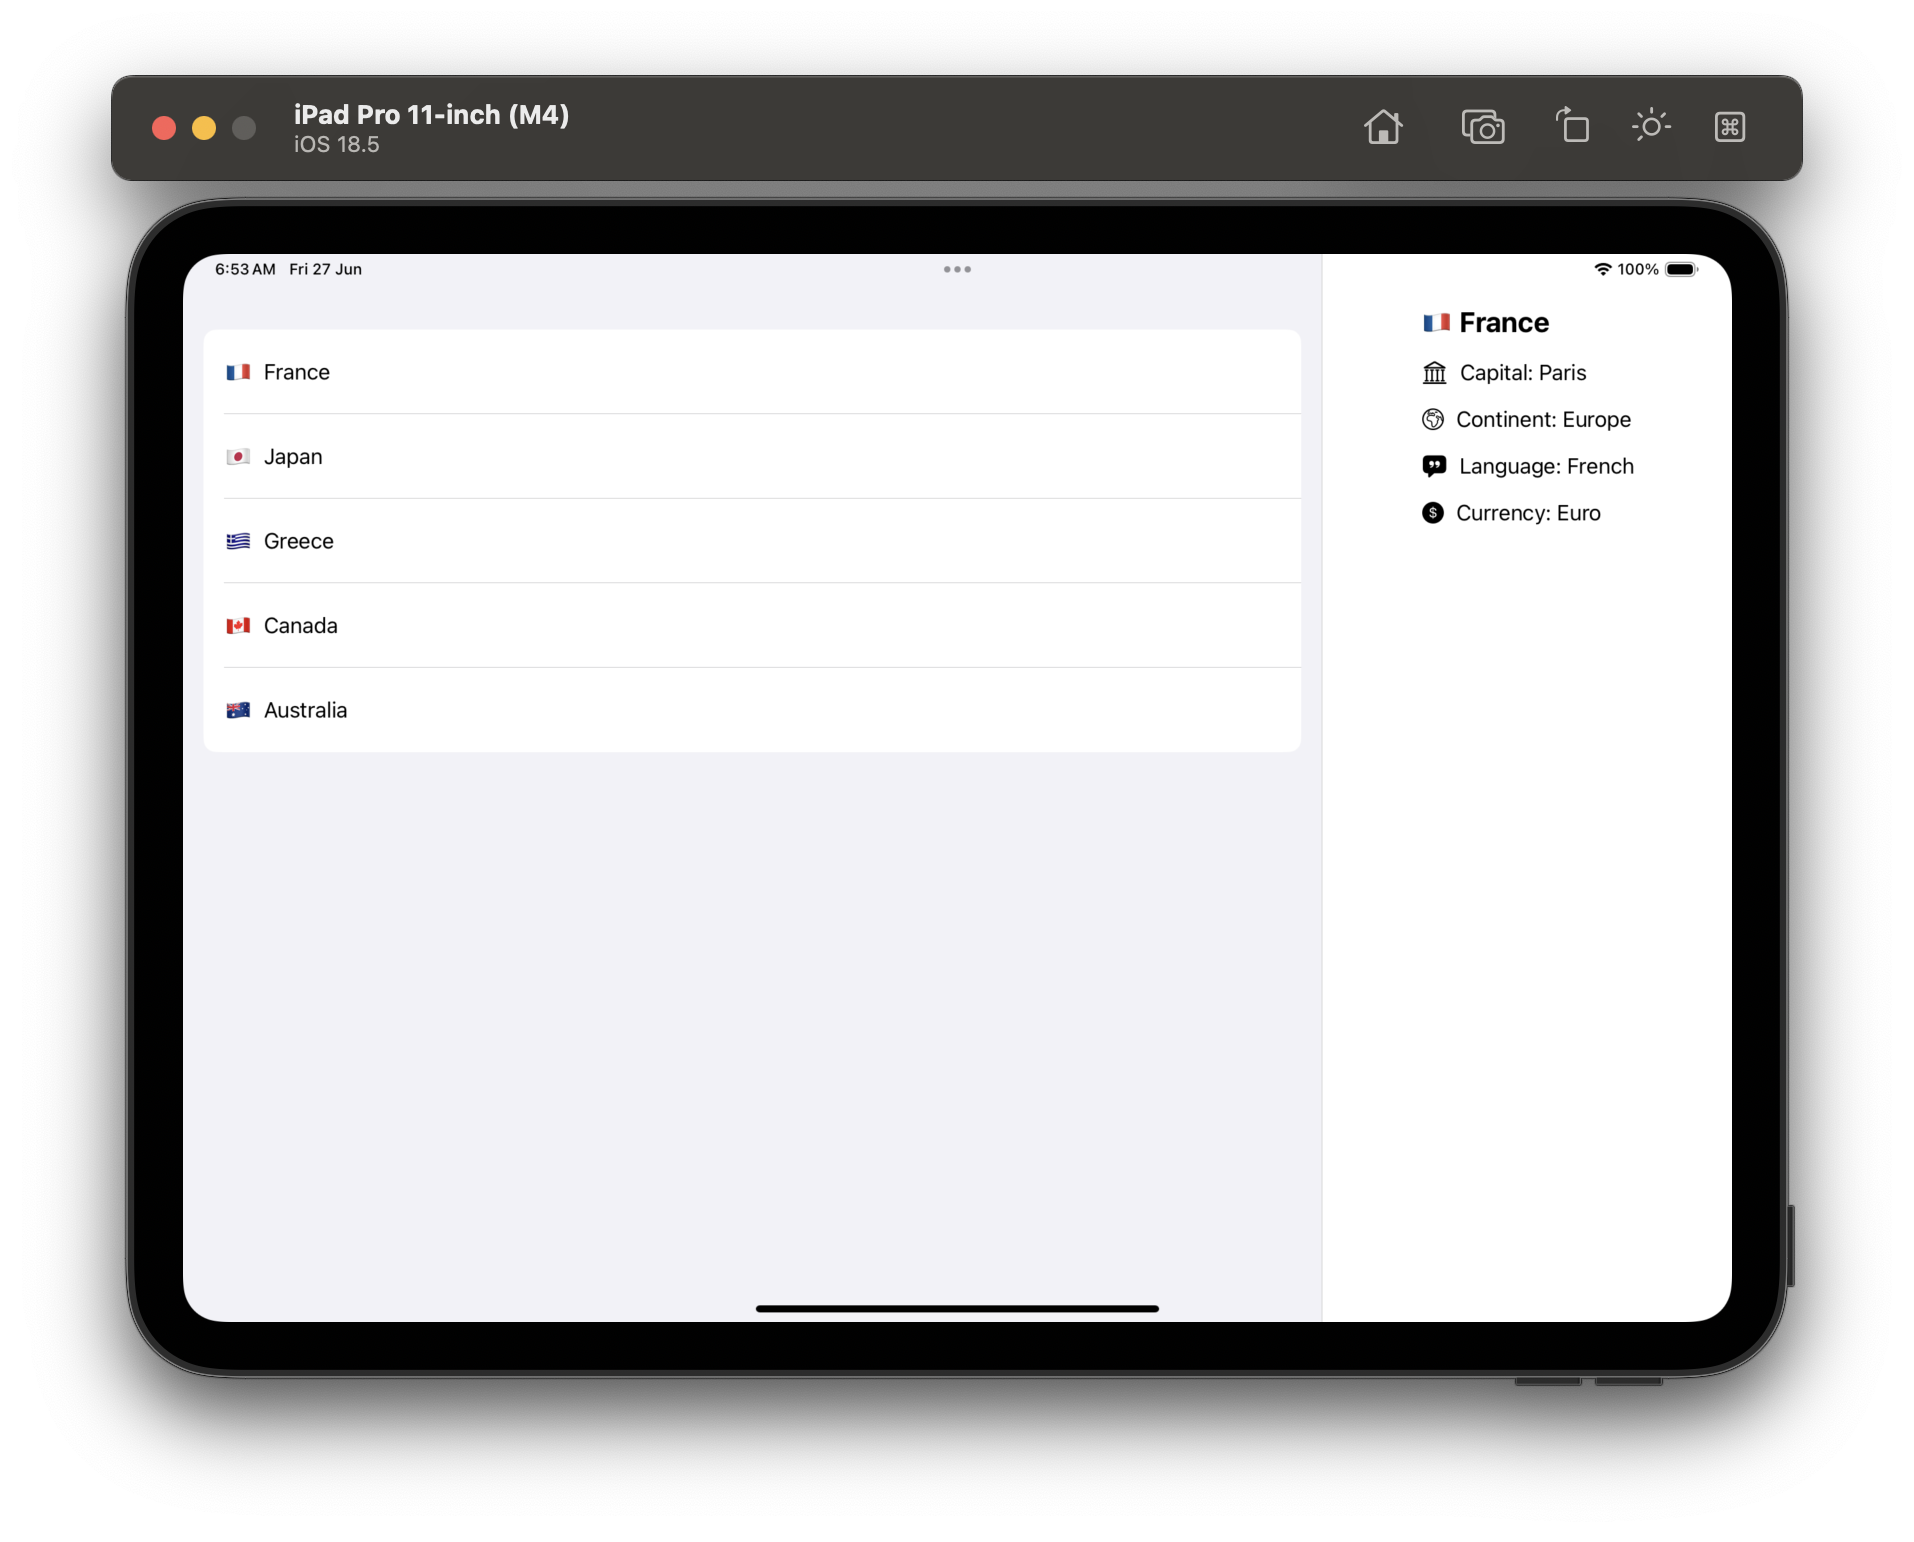
In this post the examples mostly focus on macOS, but everything you’ll read also applies to iPadOS too.
Presenting the inspector view
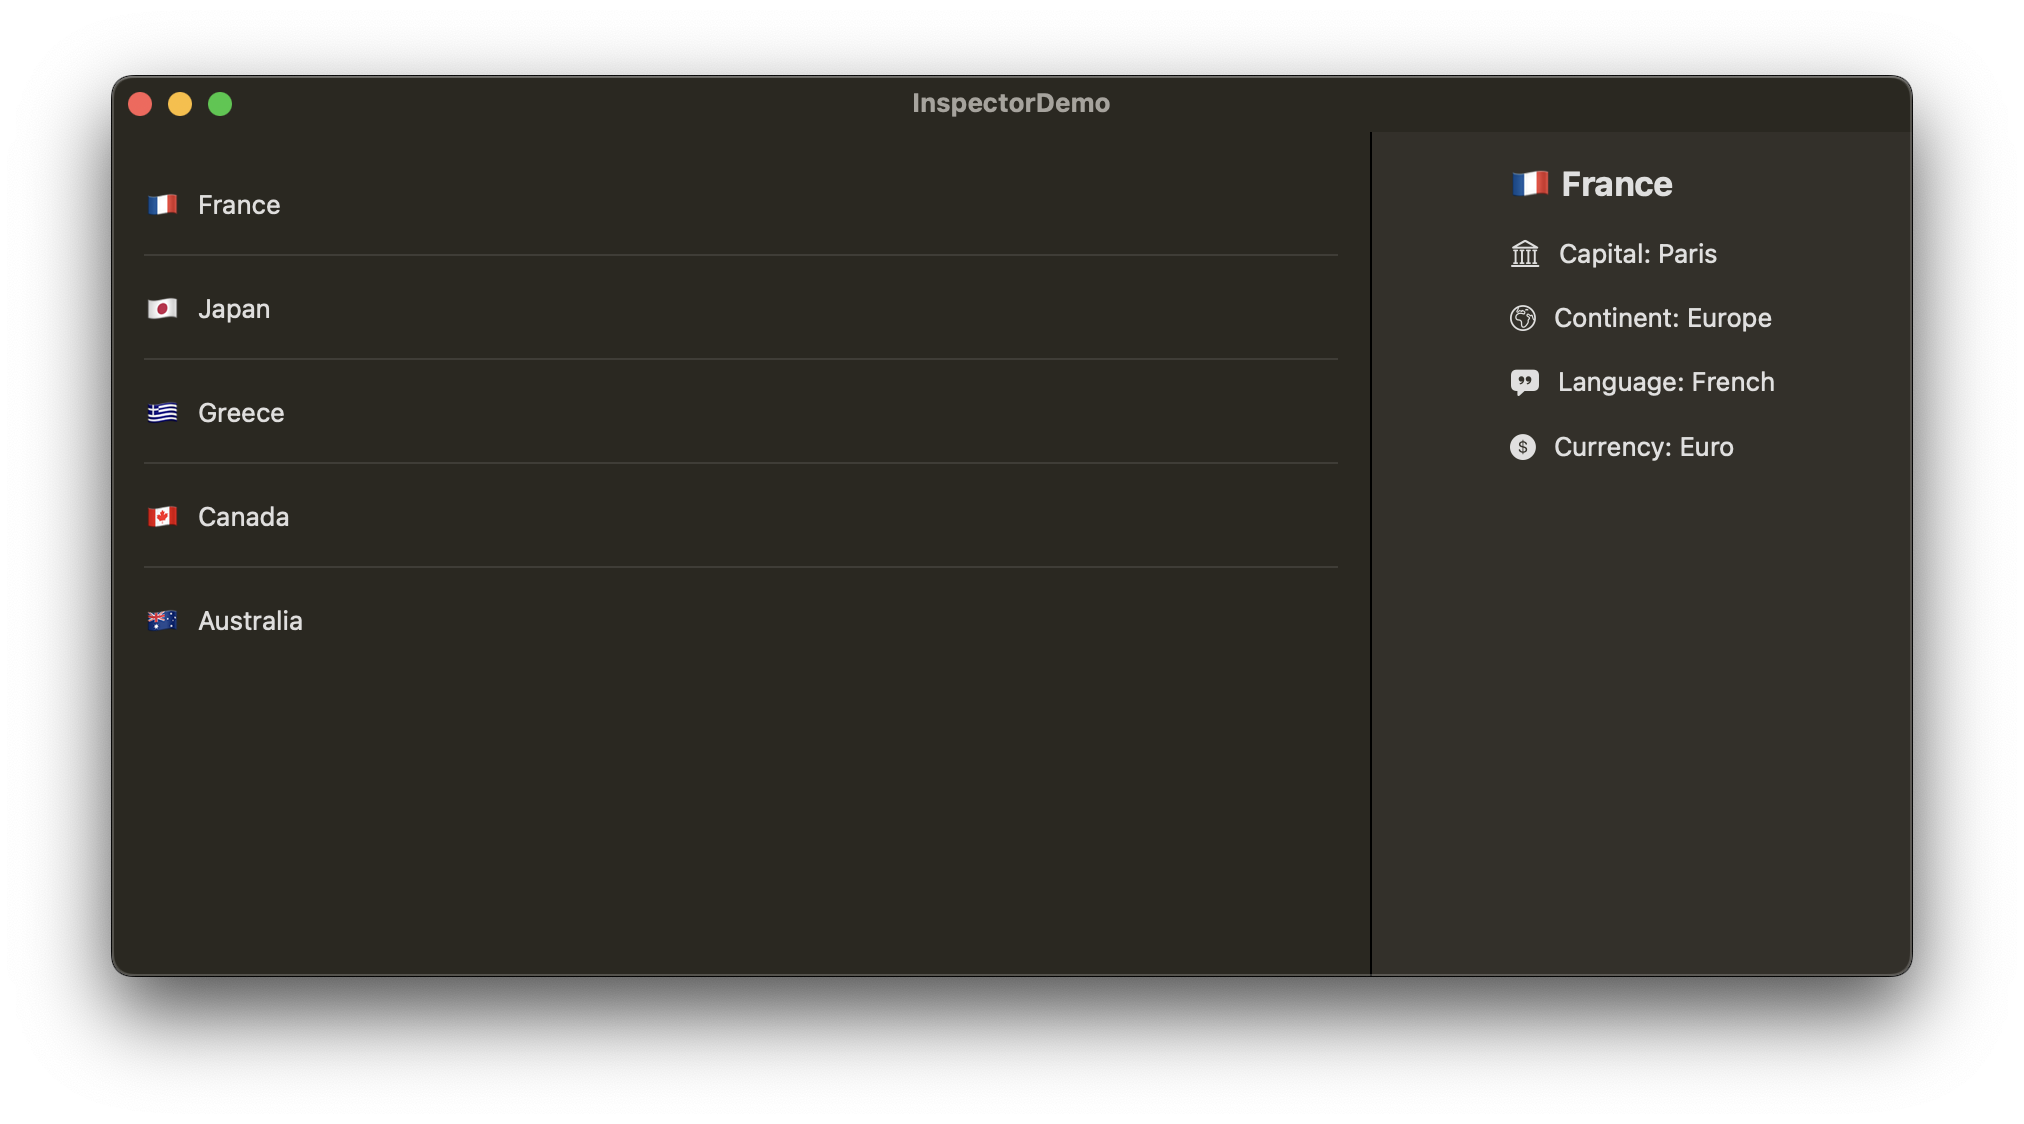
Presenting the inspector is not difficult, as we treat its appearance process like sheets or alerts in SwiftUI. For the sake of the demonstration, here’s a simple view that shows a list of countries, which, when clicked or tapped, show the inspector with details about each country:
|
1 2 3 4 5 6 7 8 9 10 11 12 13 14 15 16 17 18 19 20 |
struct ContentView: View { @State private var selectedCountry: Country? var body: some View { List(Country.sampleCountries) { country in Button { selectedCountry = country } label: { HStack { Text(country.flag) Text(country.name) } .frame(height: 44) } .buttonStyle(.plain) } } } |
To present the inspector, we need to apply the inspector(isPresented:content:) modifier on the list as shown next. We need a boolean state property that controls the presented state of the inspector. When it becomes true in the button’s action closure the inspector is presented:
|
1 2 3 4 5 6 7 8 9 10 11 12 13 14 15 16 17 18 19 |
struct ContentView: View { @State private var selectedCountry: Country? @State private var showInspector = false var body: some View { List(Country.sampleCountries) { country in Button { selectedCountry = country showInspector = true } label: { … } .buttonStyle(.plain) } .inspector(isPresented: $showInspector) { CountryDetailsView(country: selectedCountry) } } } |
For your reference, CountryDetailsView and the Country type are the following (expand for more):
|
1 2 3 4 5 6 7 8 9 10 11 12 13 14 15 16 17 18 19 20 21 22 23 24 25 26 27 28 29 30 31 32 33 34 35 36 37 38 39 40 41 |
struct CountryDetailsView: View { let country: Country? var body: some View { VStack(alignment: .leading, spacing: 16) { if let country { Text(“\(country.flag) \(country.name)“) .font(.title2) .fontWeight(.bold) Group { Label( “Capital: \(country.capital)“, systemImage: “building.columns” ) Label( “Continent: \(country.continent)“, systemImage: “globe.europe.africa” ) Label( “Language: \(country.language)“, systemImage: “quote.bubble.fill” ) Label( “Currency: \(country.currency)“, systemImage: “dollarsign.circle.fill” ) } .labelStyle(.titleAndIcon) Spacer() } else { Text(“Please select a country.”) } } .padding() .frame(minWidth: 150) } } |
Country is a custom type containing a few sample countries for the example:
|
1 2 3 4 5 6 7 8 9 10 11 12 13 14 15 16 17 18 19 20 21 22 23 24 25 26 27 28 29 30 31 32 33 34 35 36 37 38 39 40 41 42 43 44 45 46 47 48 49 50 51 52 53 54 55 |
struct Country: Identifiable, Hashable { let id = UUID() let name: String let flag: String let capital: String let continent: String let language: String let currency: String static let sampleCountries: [Country] = [ Country( name: “France”, flag: “🇫🇷”, capital: “Paris”, continent: “Europe”, language: “French”, currency: “Euro” ), Country( name: “Japan”, flag: “🇯🇵”, capital: “Tokyo”, continent: “Asia”, language: “Japanese”, currency: “Yen” ), Country( name: “Greece”, flag: “🇬🇷”, capital: “Athens”, continent: “Europe”, language: “Greek”, currency: “Euro” ), Country( name: “Canada”, flag: “🇨🇦”, capital: “Ottawa”, continent: “North America”, language: “English & French”, currency: “Canadian Dollar” ), Country( name: “Australia”, flag: “🇦🇺”, capital: “Canberra”, continent: “Oceania”, language: “English”, currency: “Australian Dollar” ) ] } |
Setting the inspector’s width
Inspector is presented with a default width, which is enough most of the time for almost any content we want so show. However, there are modifiers that allow us to change it when needed. Using the inspectorColumnWidth(_:) we can set a fixed width:
|
1 2 3 4 5 6 |
.inspector(isPresented: $showInspector) { CountryDetailsView(country: selectedCountry) .inspectorColumnWidth(400) } |
However, fixed width does not allow to resize inspector by dragging it from the edge. There’s another modifier that lets us set the minimum, ideal, and maximum desired width for the inspector, which enables dynamic resizing within the minimum and maximum values:
|
1 2 3 4 5 6 |
.inspector(isPresented: $showInspector) { CountryDetailsView(country: selectedCountry) .inspectorColumnWidth(min: 150, ideal: 250, max: 400) } |
Combining inspector with navigation stack and the toolbar
By default, the inspector is as high as the window, leaving the title bar intact when a toolbar does not exist. We can add a toolbar to the inspector view directly with a button to toggle its appearance, or more buttons when that’s necessary:
|
1 2 3 4 5 6 7 8 9 10 11 12 13 |
List(Country.sampleCountries) { country in … } .inspector(isPresented: $showInspector) { CountryDetailsView(country: selectedCountry) .toolbar { Button(“”, systemImage: “info.circle”) { showInspector.toggle() } } } |
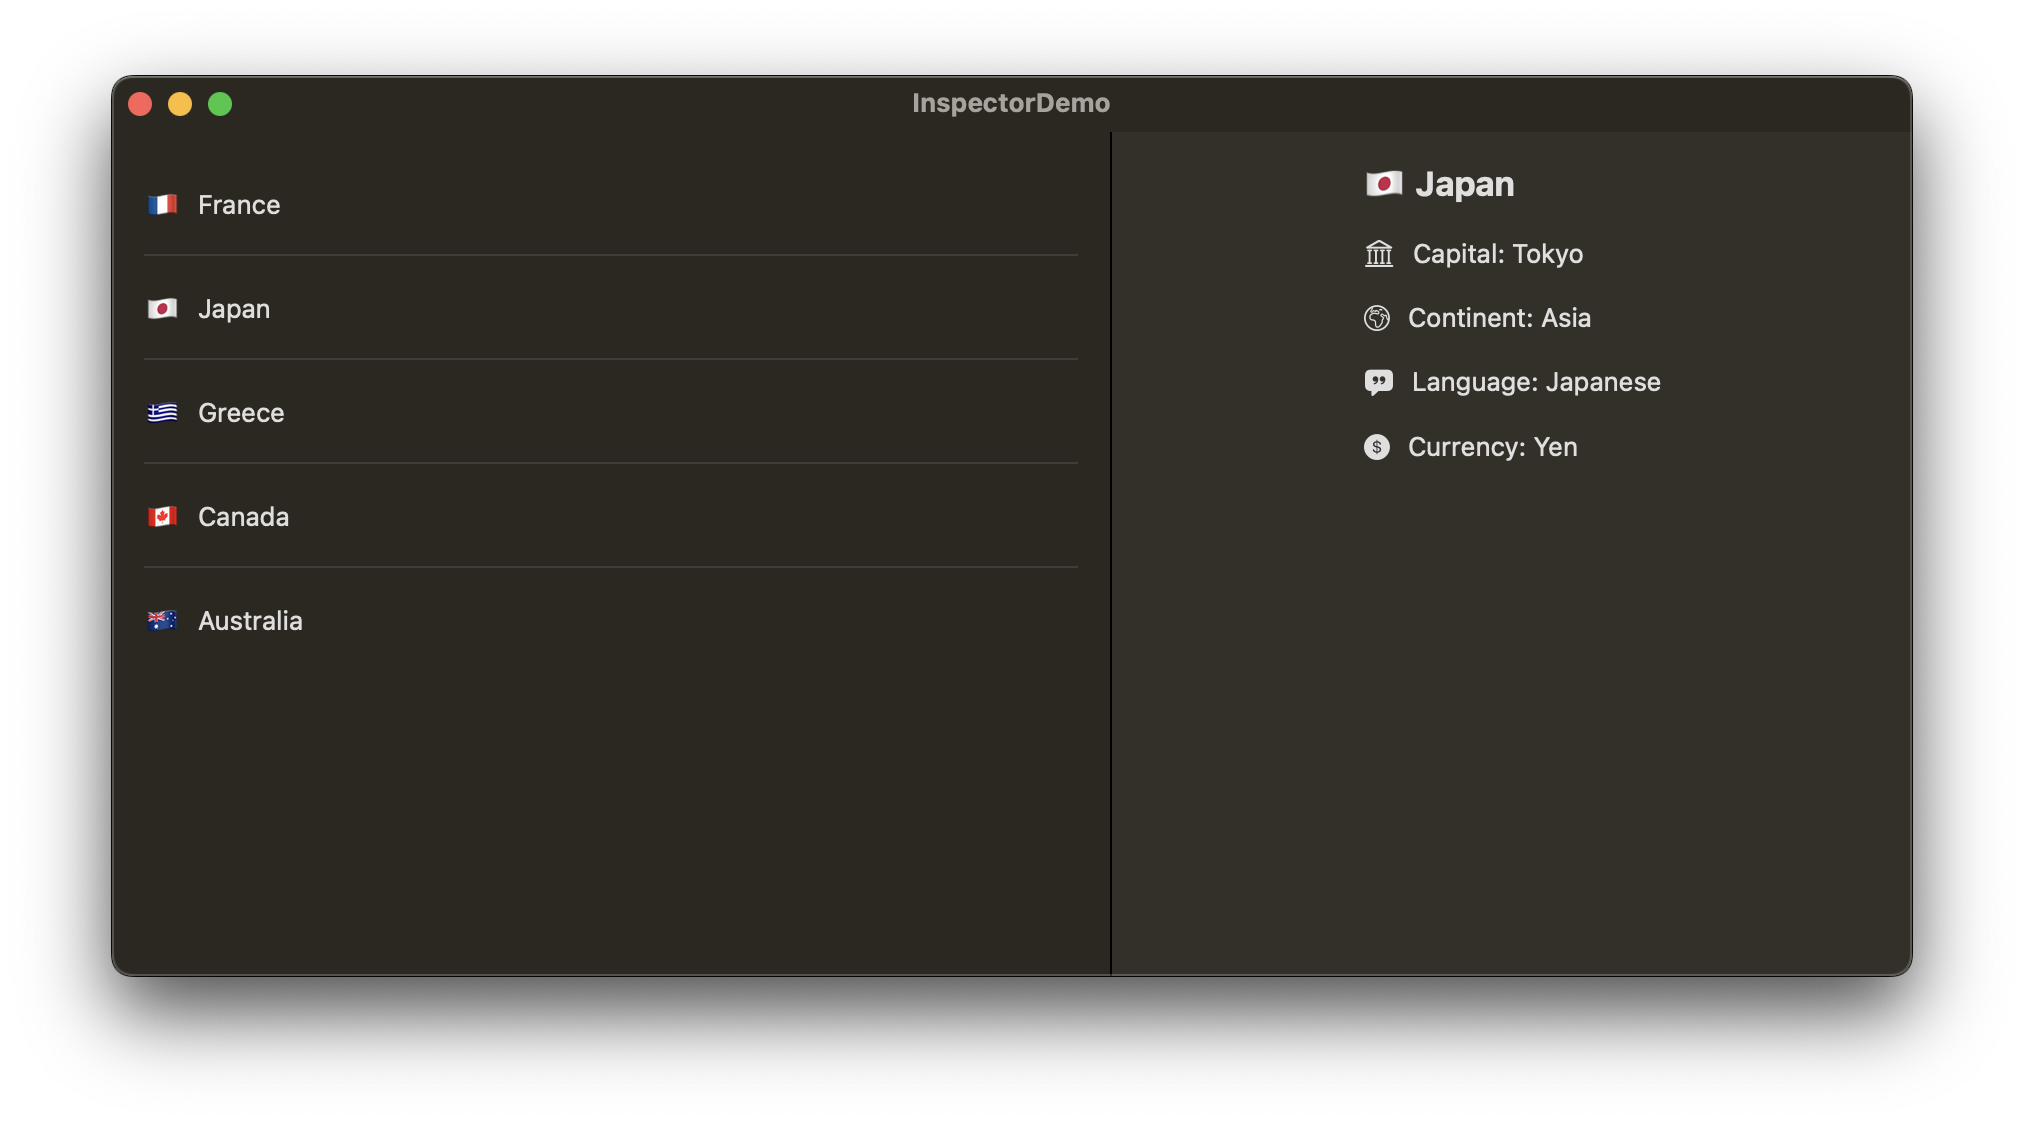
By doing that, the inspector extends to the full height of the window, with the title bar stopping right where the inspector begins:
The same effect is produced when there’s a navigation structure, such as a NavigationStack, and the inspector is applied on it, not to the list:
|
1 2 3 4 5 6 7 8 9 10 11 12 13 14 15 |
NavigationStack { List(Country.sampleCountries) { country in … } } .inspector(isPresented: $showInspector) { CountryDetailsView(country: selectedCountry) .toolbar { Button(“”, systemImage: “info.circle”) { showInspector.toggle() } } } |
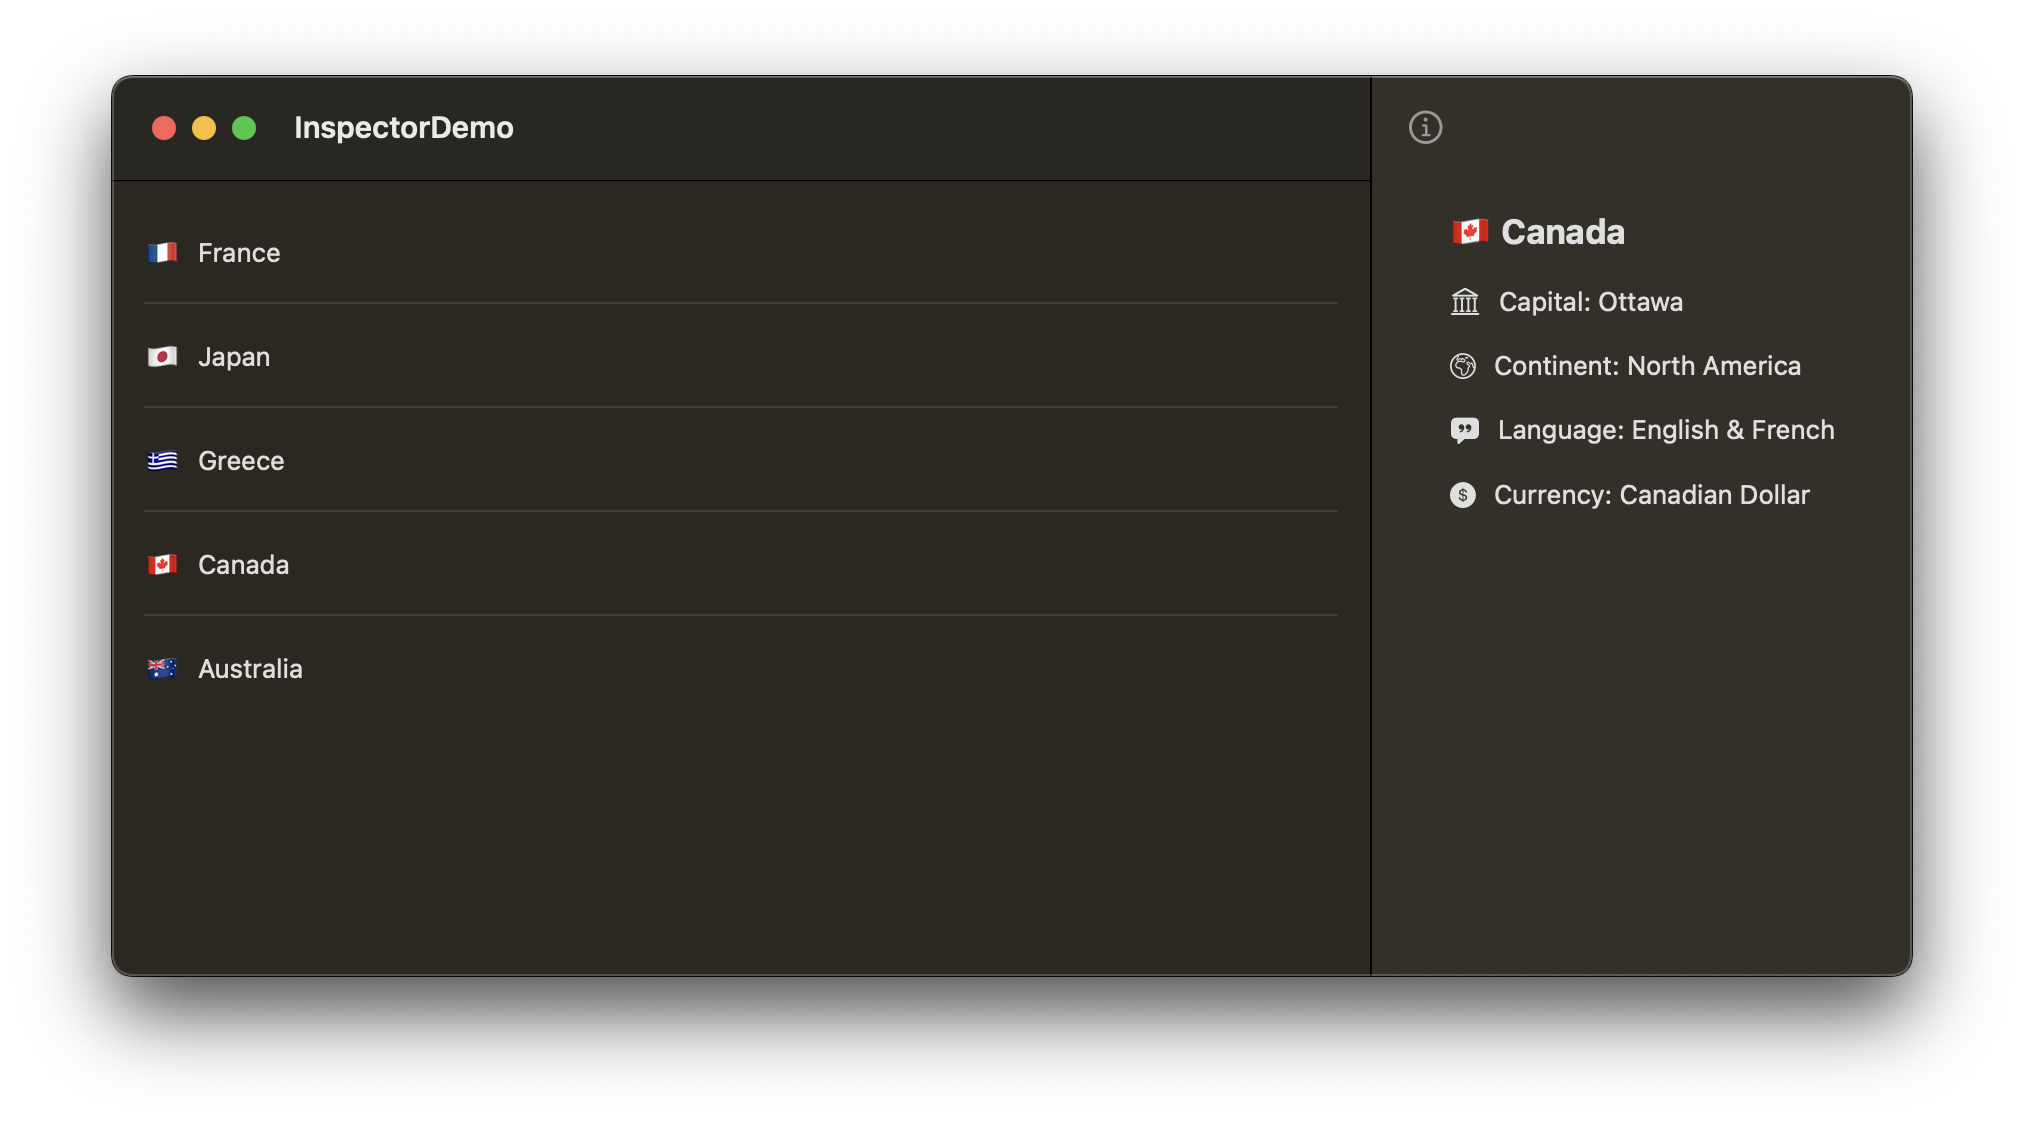
See that the toolbar button appears in the inspector when visible, while it seems as part of the main toolbar when the inspector is hidden. We can move that button to a toolbar attached to the list (main toolbar of the view). In that case, the button won’t show as part of the inspector anymore when it’s presented:
|
1 2 3 4 5 6 7 8 9 10 11 12 13 14 15 |
NavigationStack { List(Country.sampleCountries) { country in … } .toolbar { Button(“”, systemImage: “info.circle”) { showInspector.toggle() } } } .inspector(isPresented: $showInspector) { CountryDetailsView(country: selectedCountry) } |
If we apply the inspector to the list and inside the navigation stack, then the toolbar and the window title bar occupy the entire width of the window, and the inspector becomes as high as the rest of the content. If there’s scrollable content, then it’s overlapped by the toolbar. Additionally, it makes no difference visually if the inspector has its own toolbar items or not; they all seem as part of the main toolbar:
|
1 2 3 4 5 6 7 8 9 10 11 12 13 14 15 |
NavigationStack { List(Country.sampleCountries) { country in … } .inspector(isPresented: $showInspector) { CountryDetailsView(country: selectedCountry) .toolbar { Button(“”, systemImage: “info.circle”) { showInspector.toggle() } } } } |
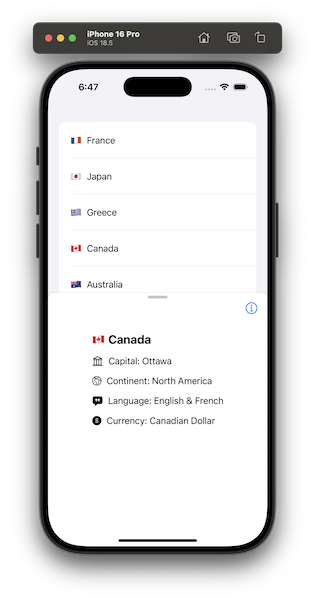
Inspector and the compact horizontal size class
It’s already mentioned in the introduction that the inspector is transformed into a sheet when the current horizontal size class of the device is compact; for instance, an iPhone in portrait orientation. There are two things to remember in this case:
- Since we are dealing with a sheet, we can apply modifiers that are sheet-specific, like
presentationDetentsandpresentationDragIndicator. You can read more about them in this older post. - When expecting an app to run in compact horizontal size class, then we should be more thoughtful when it comes to the inspector’s toolbar items. Unlike to the previous examples where the inspector’s toolbar button remains visible even when the inspector is not presented, in compact horizontal size class that toolbar appears inside the sheet. Therefore, it’s dismissed along with it, while it never appears in the main toolbar of the view. Keep that in mind if you want to toggle inspector’s (sheet) visibility using a toolbar button; keep it always on the main toolbar if that’s the case, not in the inspector’s toolbar.
Wrapping up
Inspector is a view familiar to users and suitable to show additional or detailed content. As you read here, it’s just a matter of a view modifier to present it, and we also have a couple of options to control its width. When used in navigation structures, such as the NavigationStack, and there also toolbars involved, then we have a few visual alternatives depending on the setup we make. If you have not been using inspector in your macOS or iPadOS apps, then maybe it’s time to start considering doing so. Thanks for reading!